Garden Automation Project
I have started a new project to fully automate my garden. The project has 3 total parts, and is written in Python, Go and Nuxt. The Python app will run on a Raspberry Pi to gather physical data and transmit it to an API running in Go. There is also a web frontend to pull the data from the API and display it in a chart. A stretch goal is to have the Raspberry Pi running off solar power.
Using a Raspberry Pi, an ADC (ADC1115), soil moisture sensors (SZYTF), an optional temp/humidity sensor (DHT22) and some kind of servo/relay to turn on pumps, monitor plant soil moisture levels and then water automatically.
Software:
Repos:
- https://gitlab.jasondale.me/jdale/plant-waterify
- https://gitlab.jasondale.me/jdale/plant-waterify-api
- https://gitlab.jasondale.me/jdale/plant-waterify-web
Hardware:
You will need a Raspberry Pi:
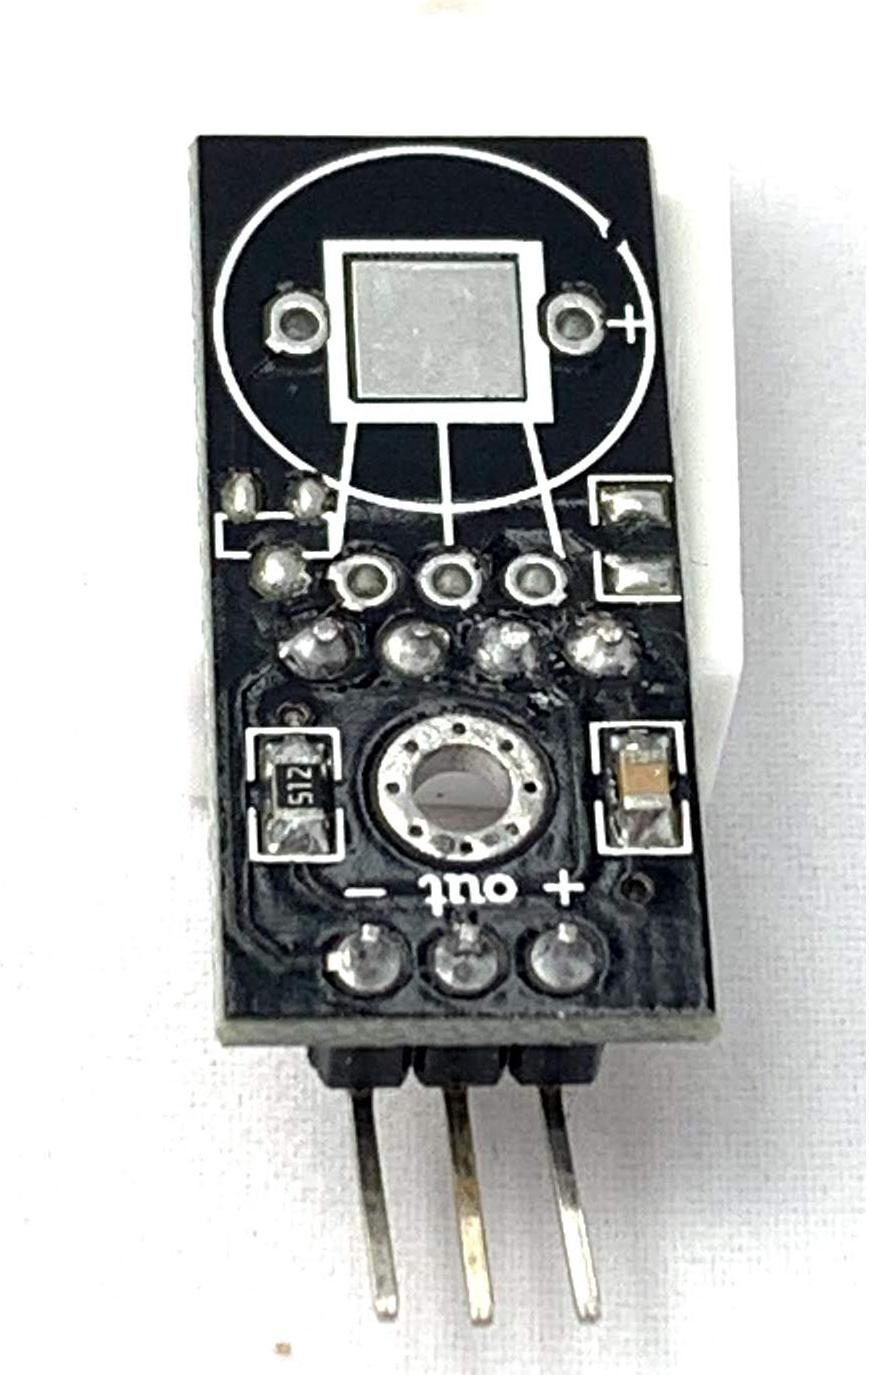
Soil moisture sensor:
- Amazon (fast, affiliate link): https://amzn.to/38E32SL
- AliExpress (cheaper but takes a month): https://www.aliexpress.com/item/32832538686.html
ADC:
The Soil Moisture Sensor is analog. GPIO on the Pi needs digital. This converts it (multiple channels too)
- Amazon (fast, affiliate link): https://amzn.to/2P63AsG
- AliExpress (cheaper but takes a month): https://www.aliexpress.com/item/32817162654.html
DHT22 Temp/Humidity Sensor (Optional):
Does exactly what you think it does
- Amazon (fast, affiliate link): https://amzn.to/2WmBkXh
- AliExpress (cheaper but takes a month): https://www.aliexpress.com/item/32753887461.html
Relay:
- Amazon (fast, affiliate link): https://amzn.to/323zlrC
- AliExpress (cheaper but takes a month): https://www.aliexpress.com/item/32997387727.html
Pumps
- Amazon (fast, affiliate link): https://amzn.to/3fIHYyh
- AliExpress (cheaper but takes a month): https://www.aliexpress.com/item/32894401053.html?spm=a2g0s.9042311.0.0.ce734c4d9tHhbt
Notes:
- The ADC needs to be soldered. It shouldn’t be too hard, I have no soldering skills and a terrible soldering iron and I was actually able to do a good job.
- You should get female to female jumper wires. This will make your life a lot easier.
Wiring it all up
This is what the finished prototype looks like before the relays are added. This is basically “alpha” stage: End result - 1 moisture sensor, no temp sensor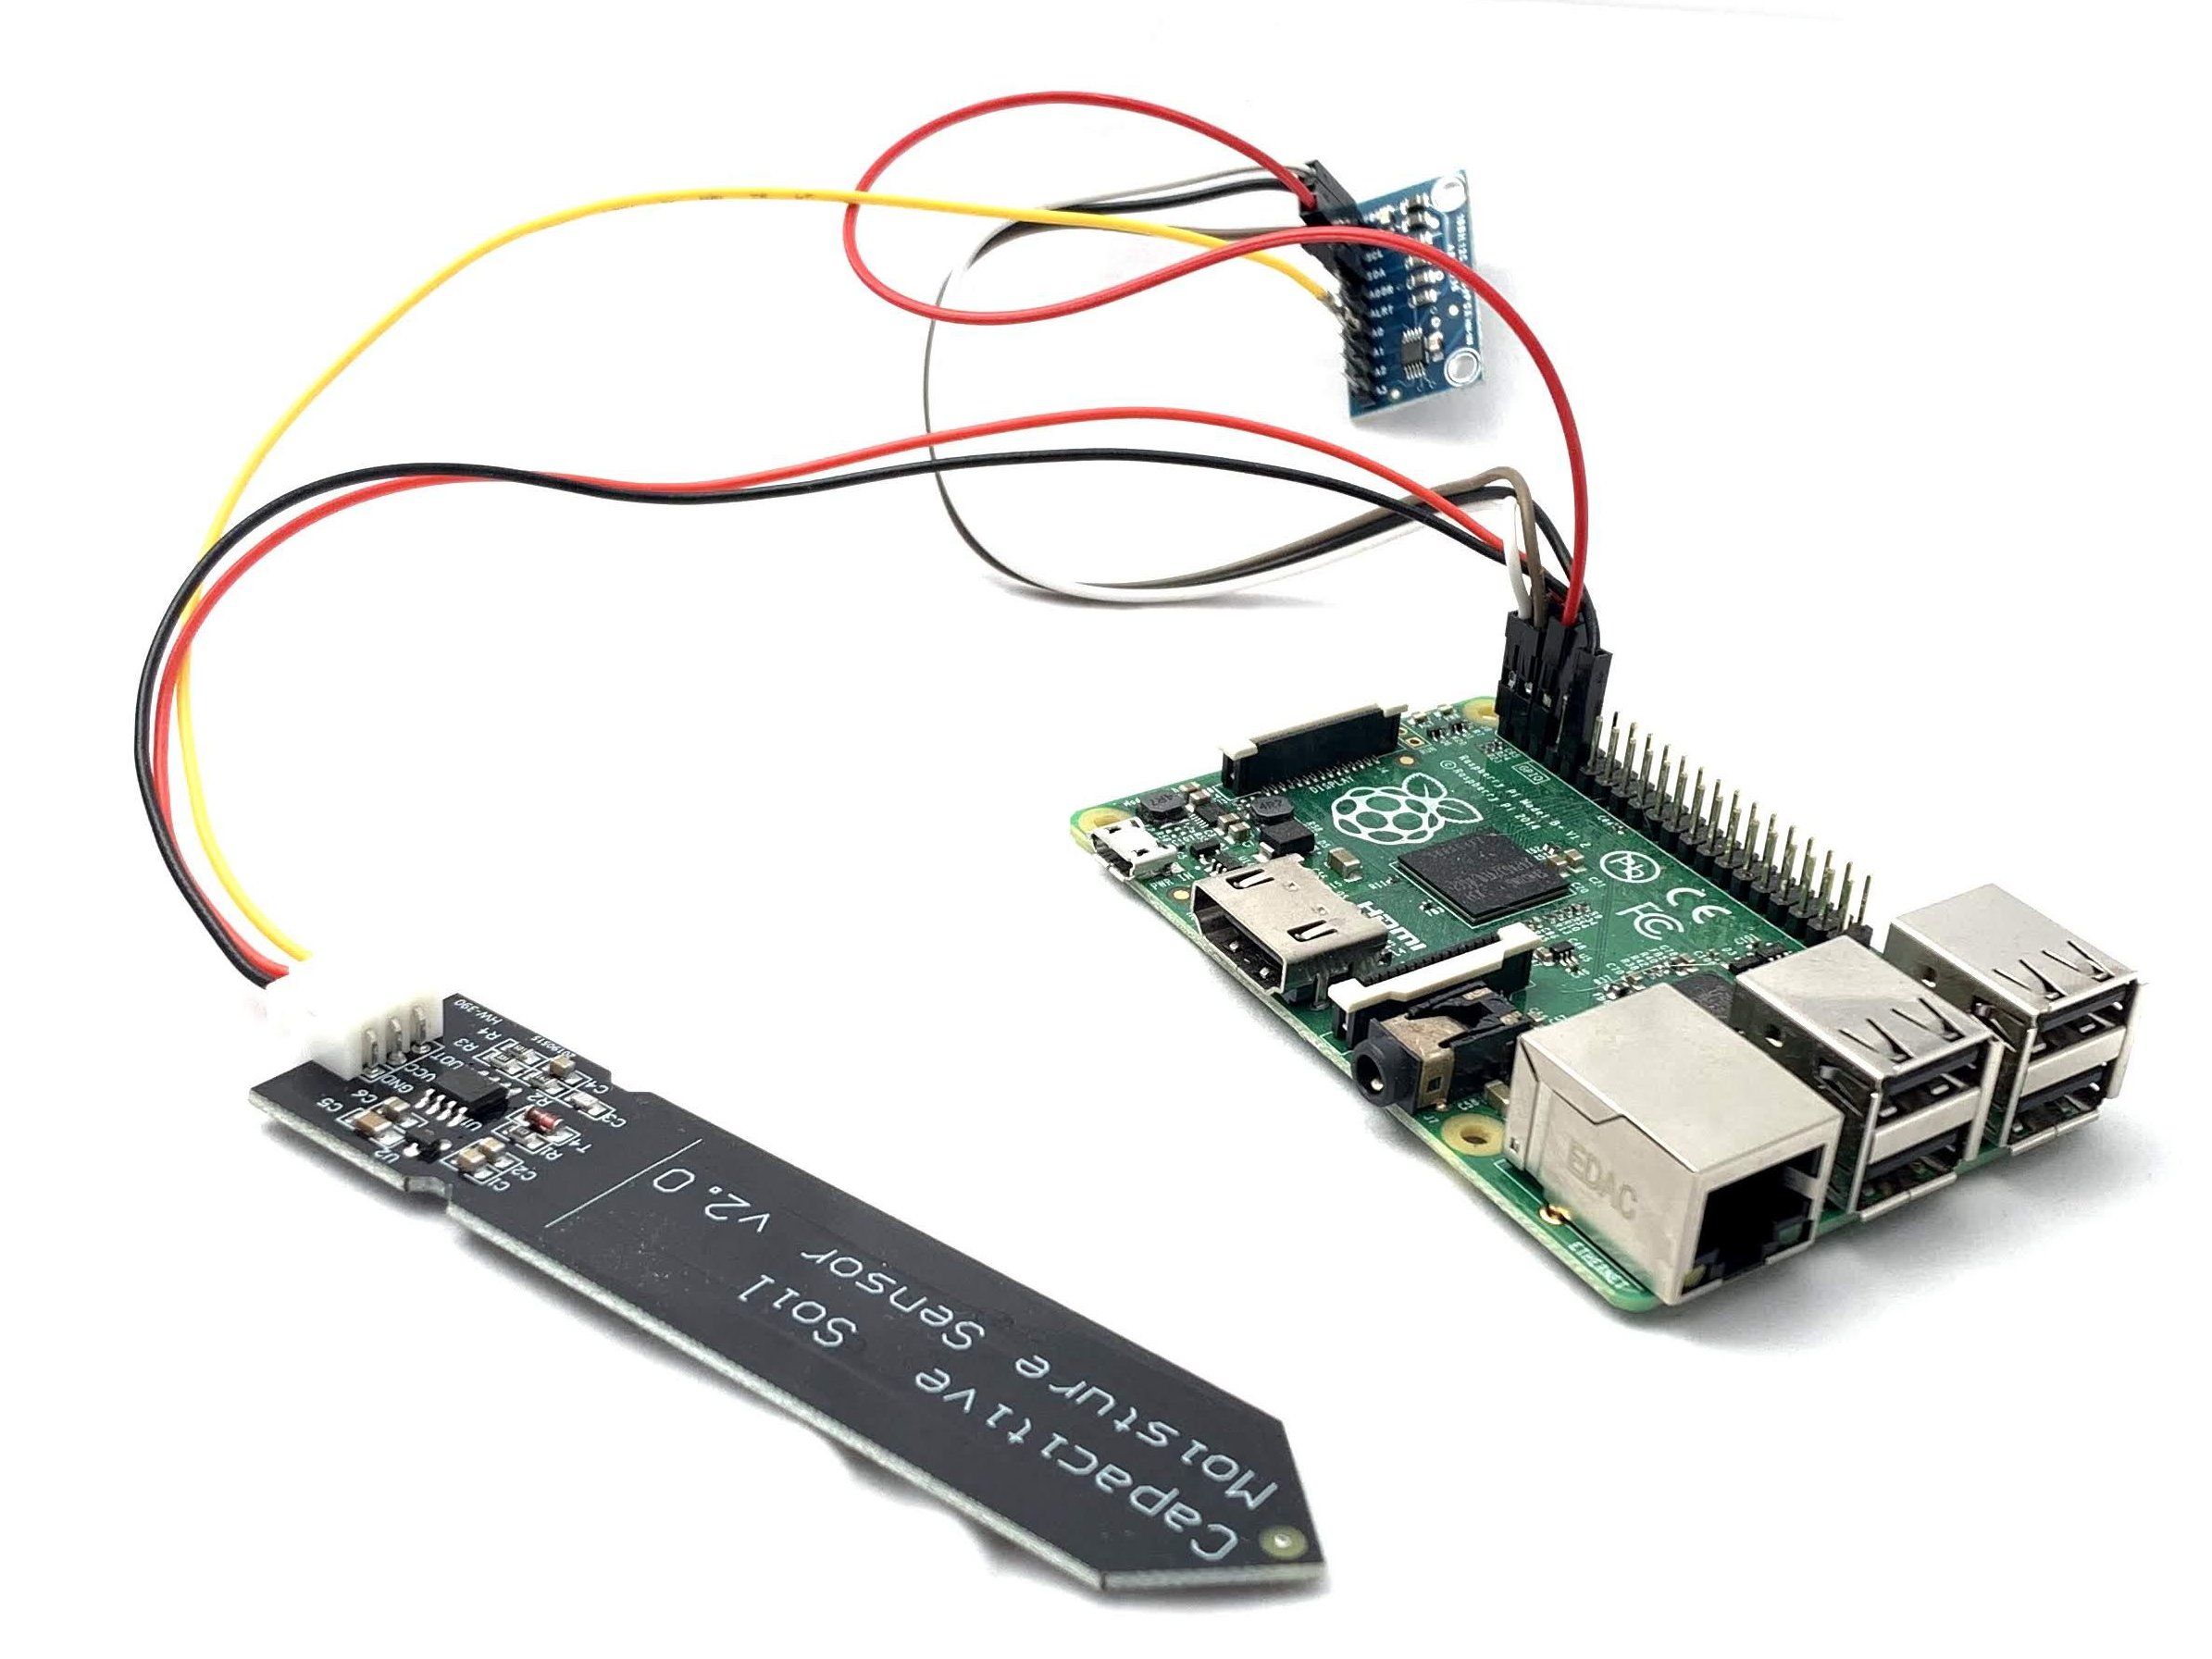
Use a GPIO diagram to figure out where to connect everything: GPIO Pinout. This may be different depending on Pi Model - Google it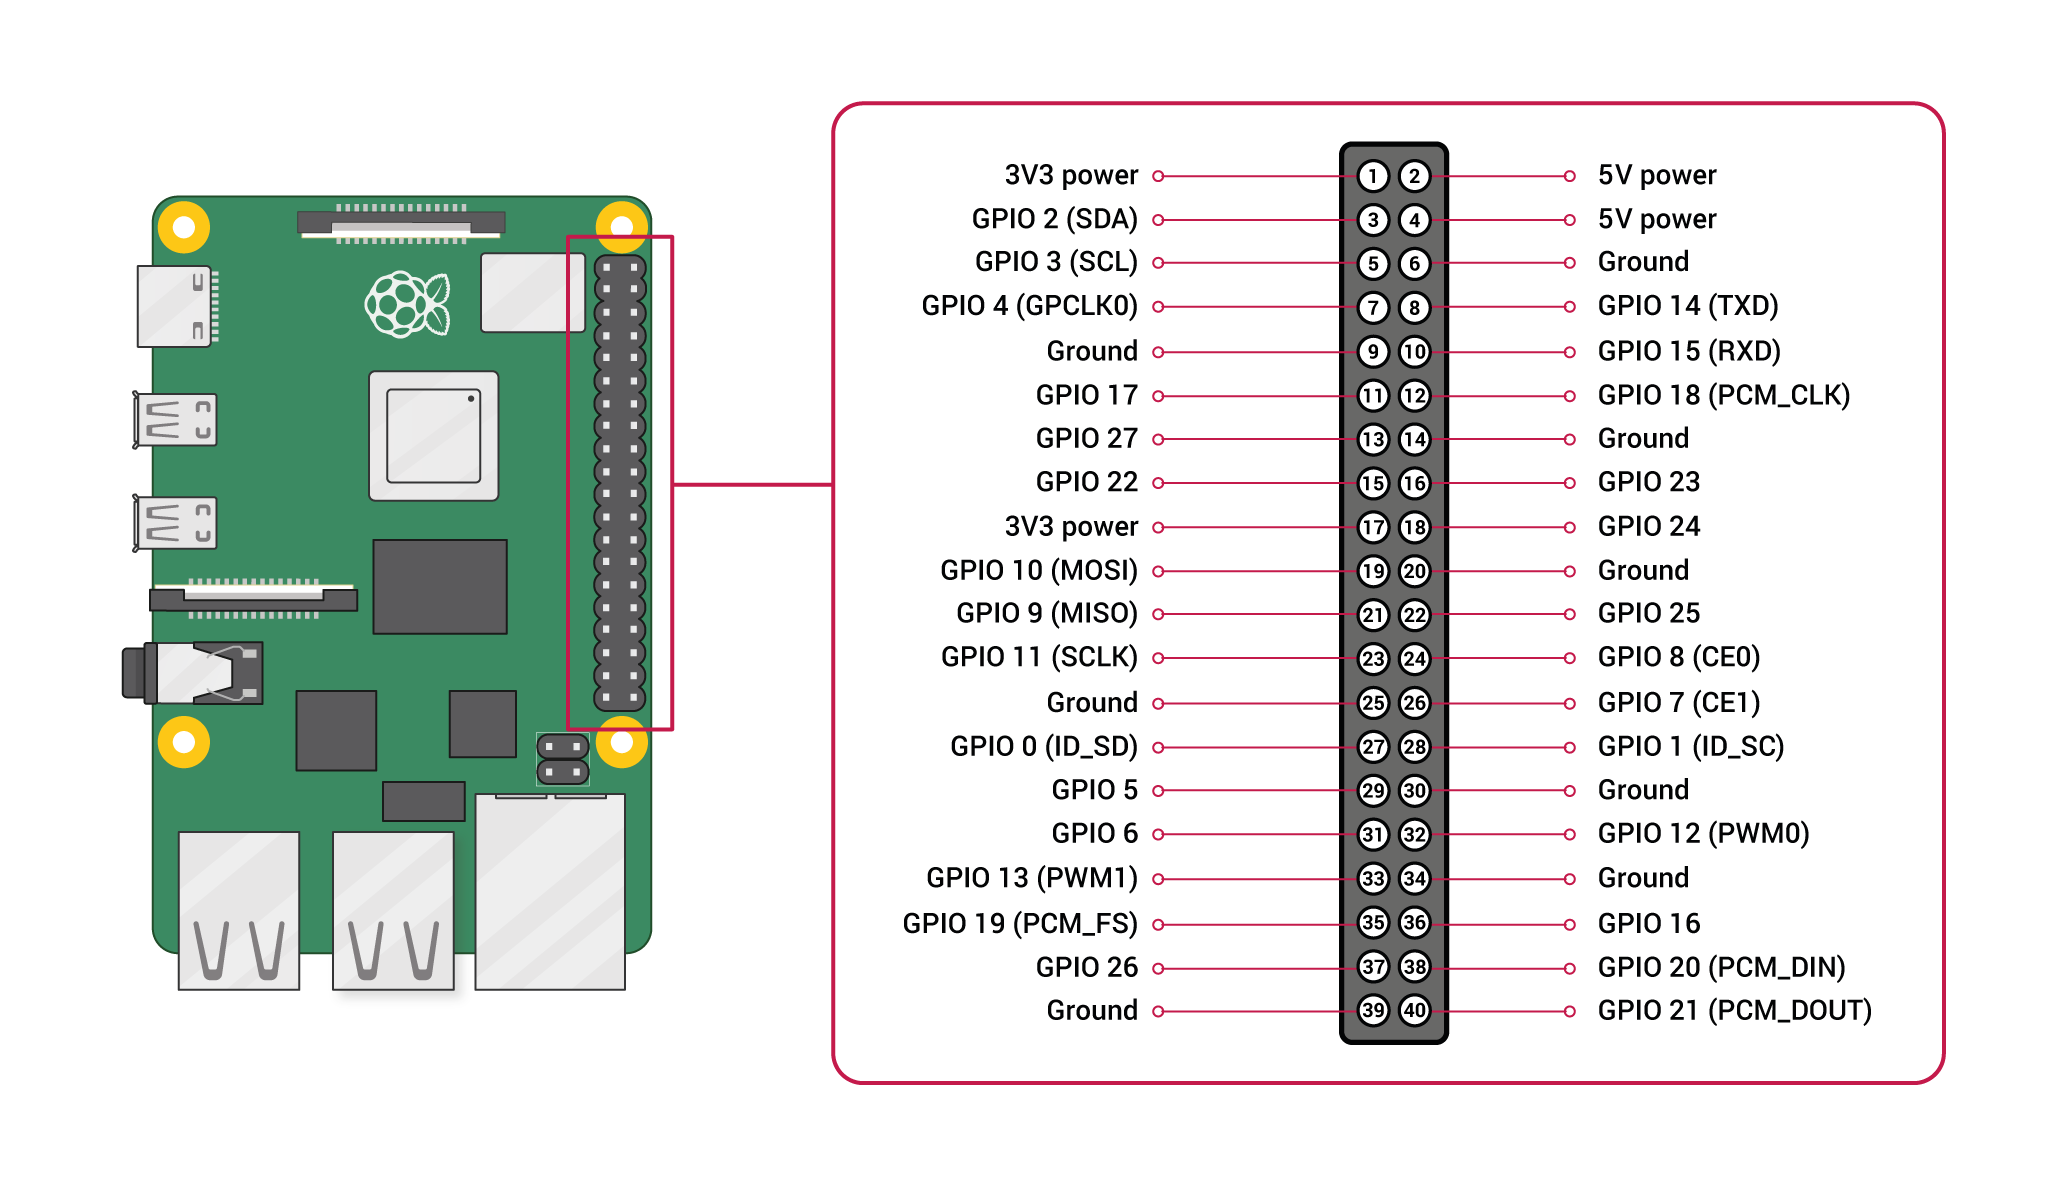
ADC
The ADC comes in 2 pieces that need to be soldered: ADC parts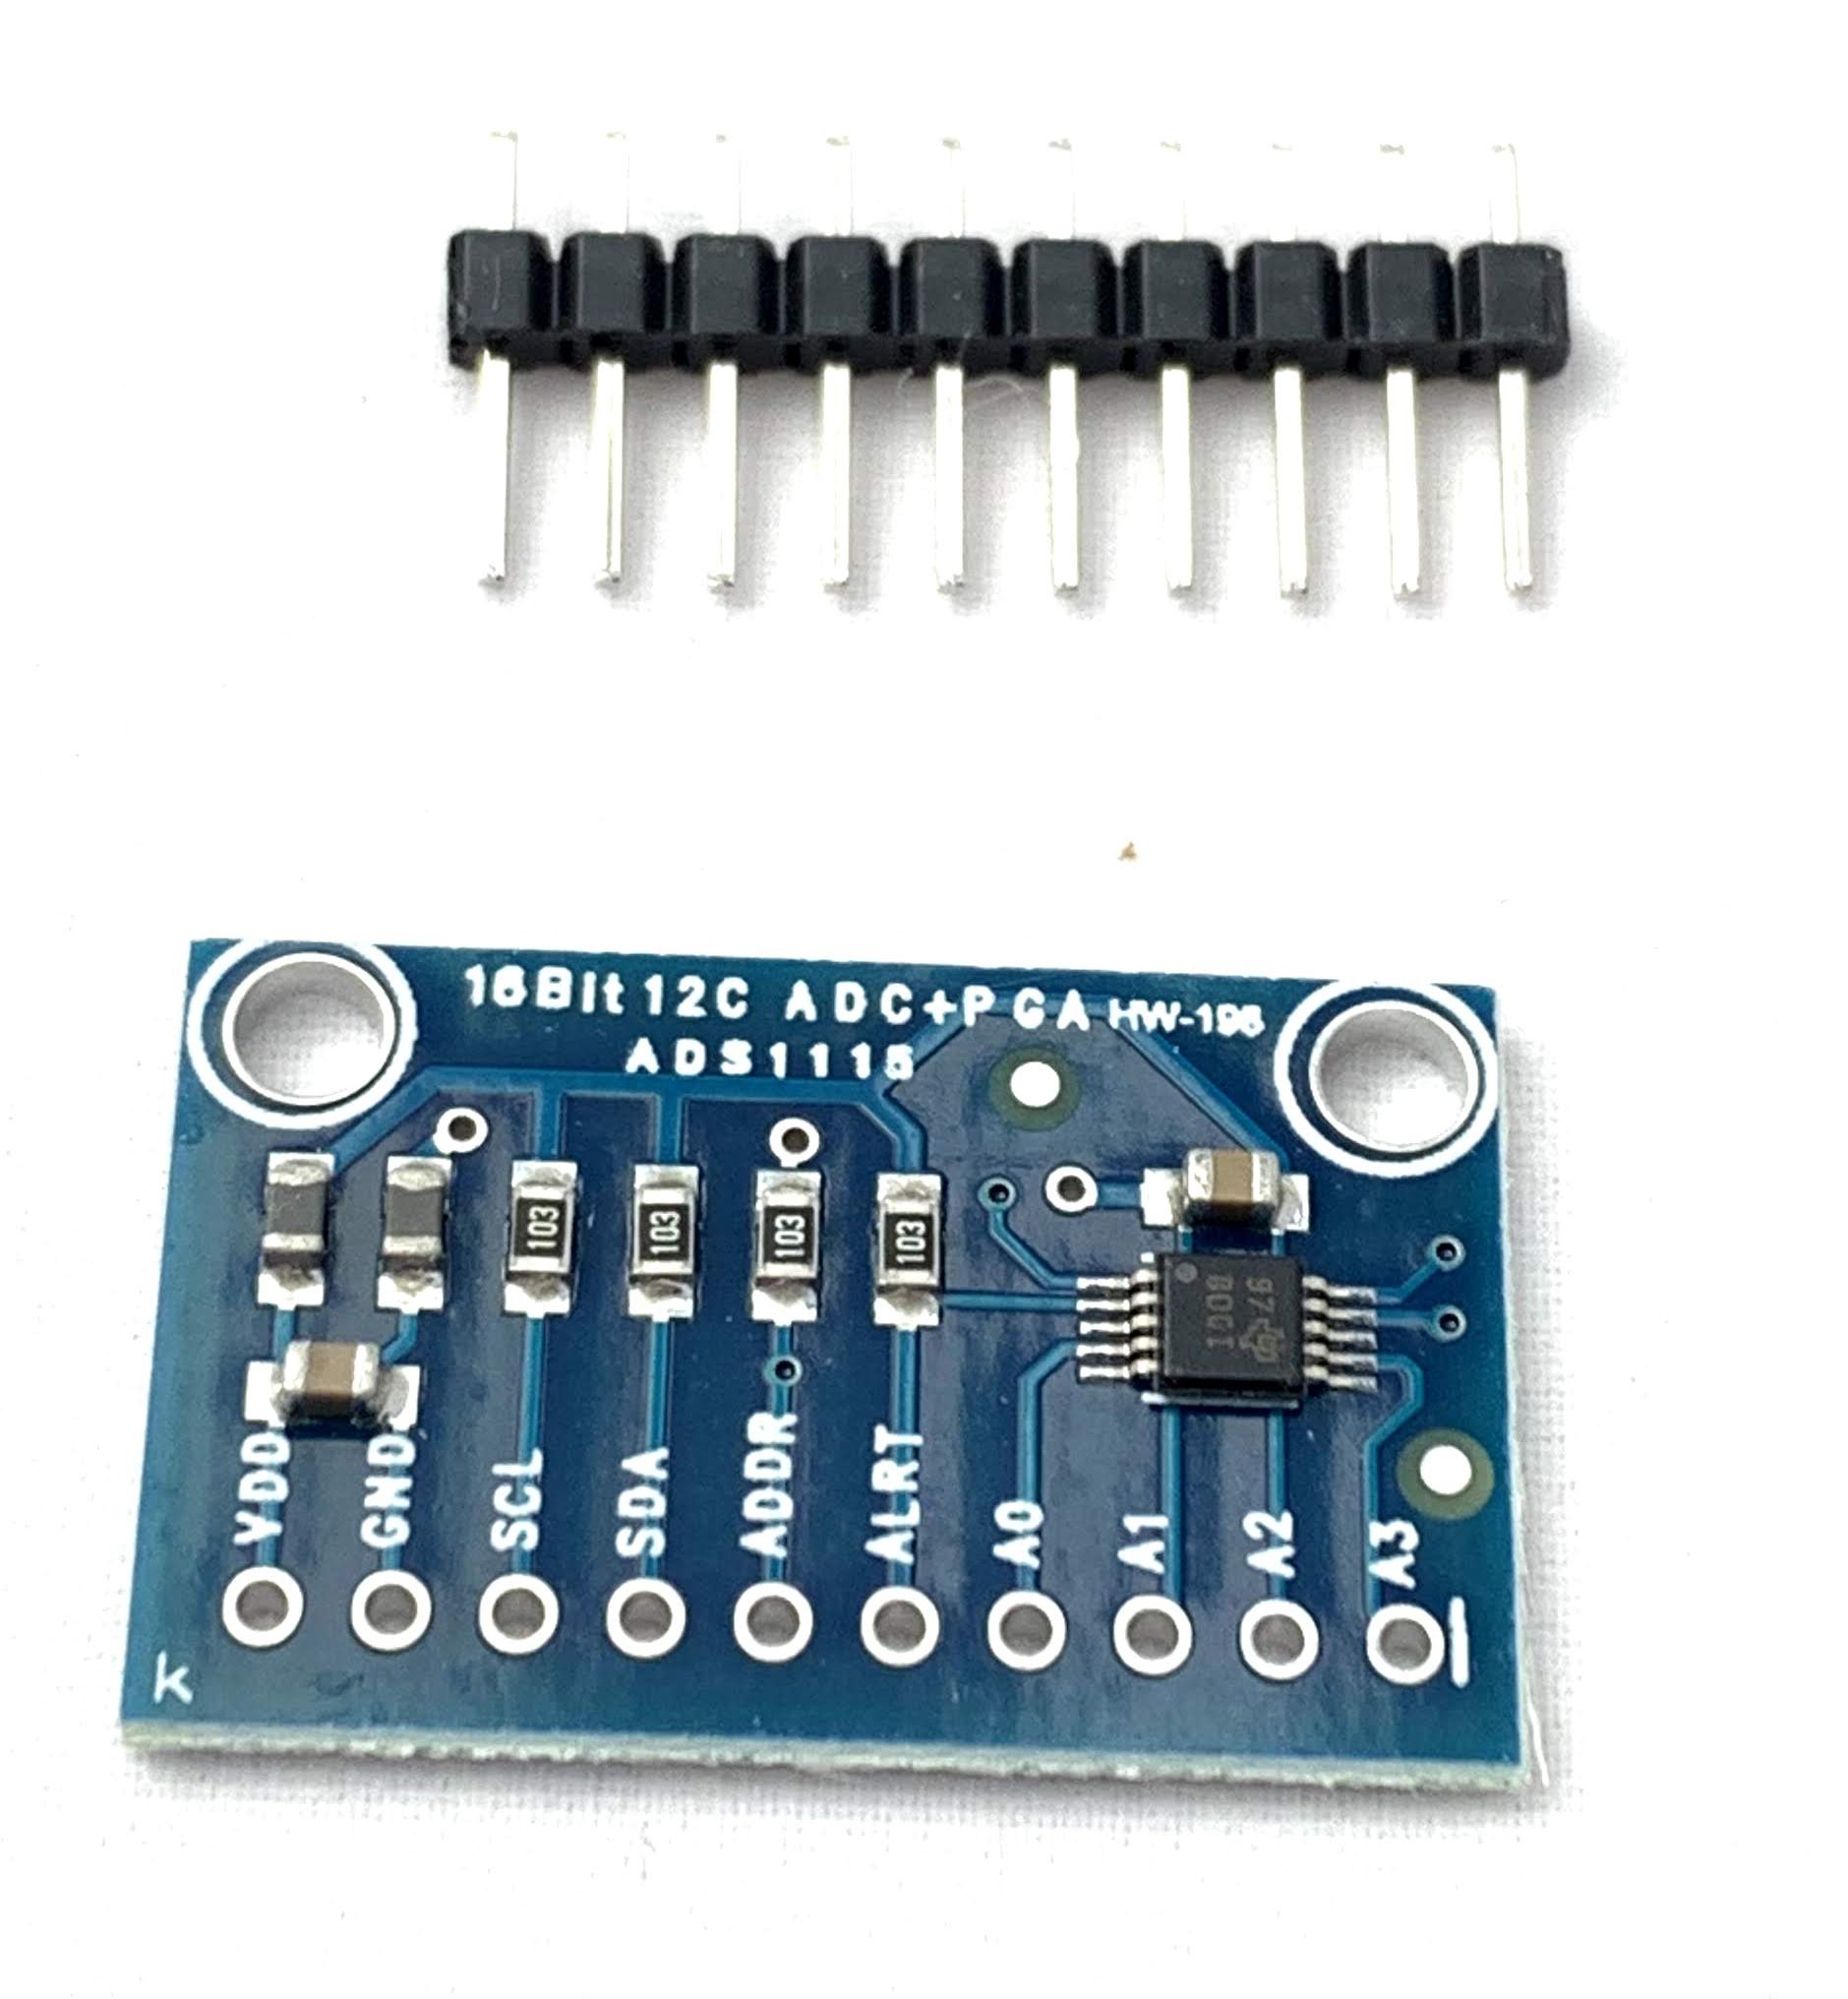
Put them together like so: Like so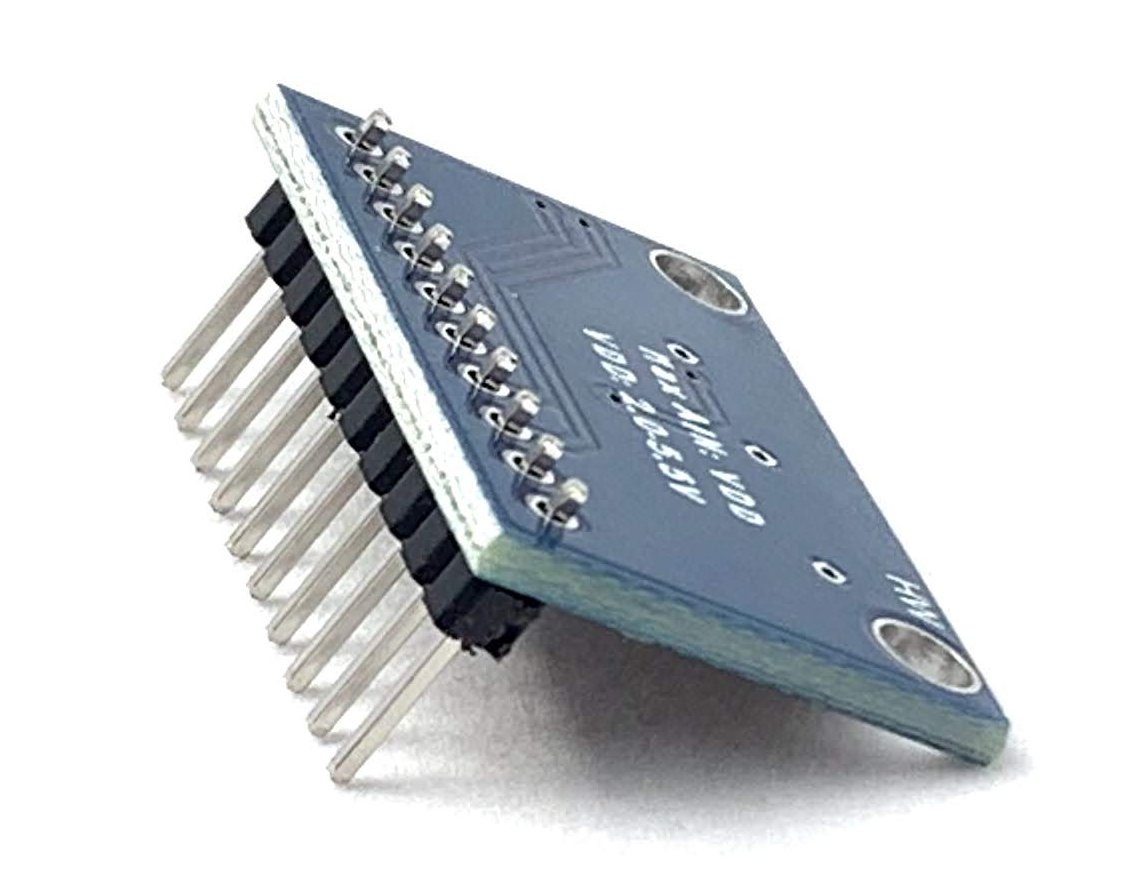
And give it your best shot at soldering them: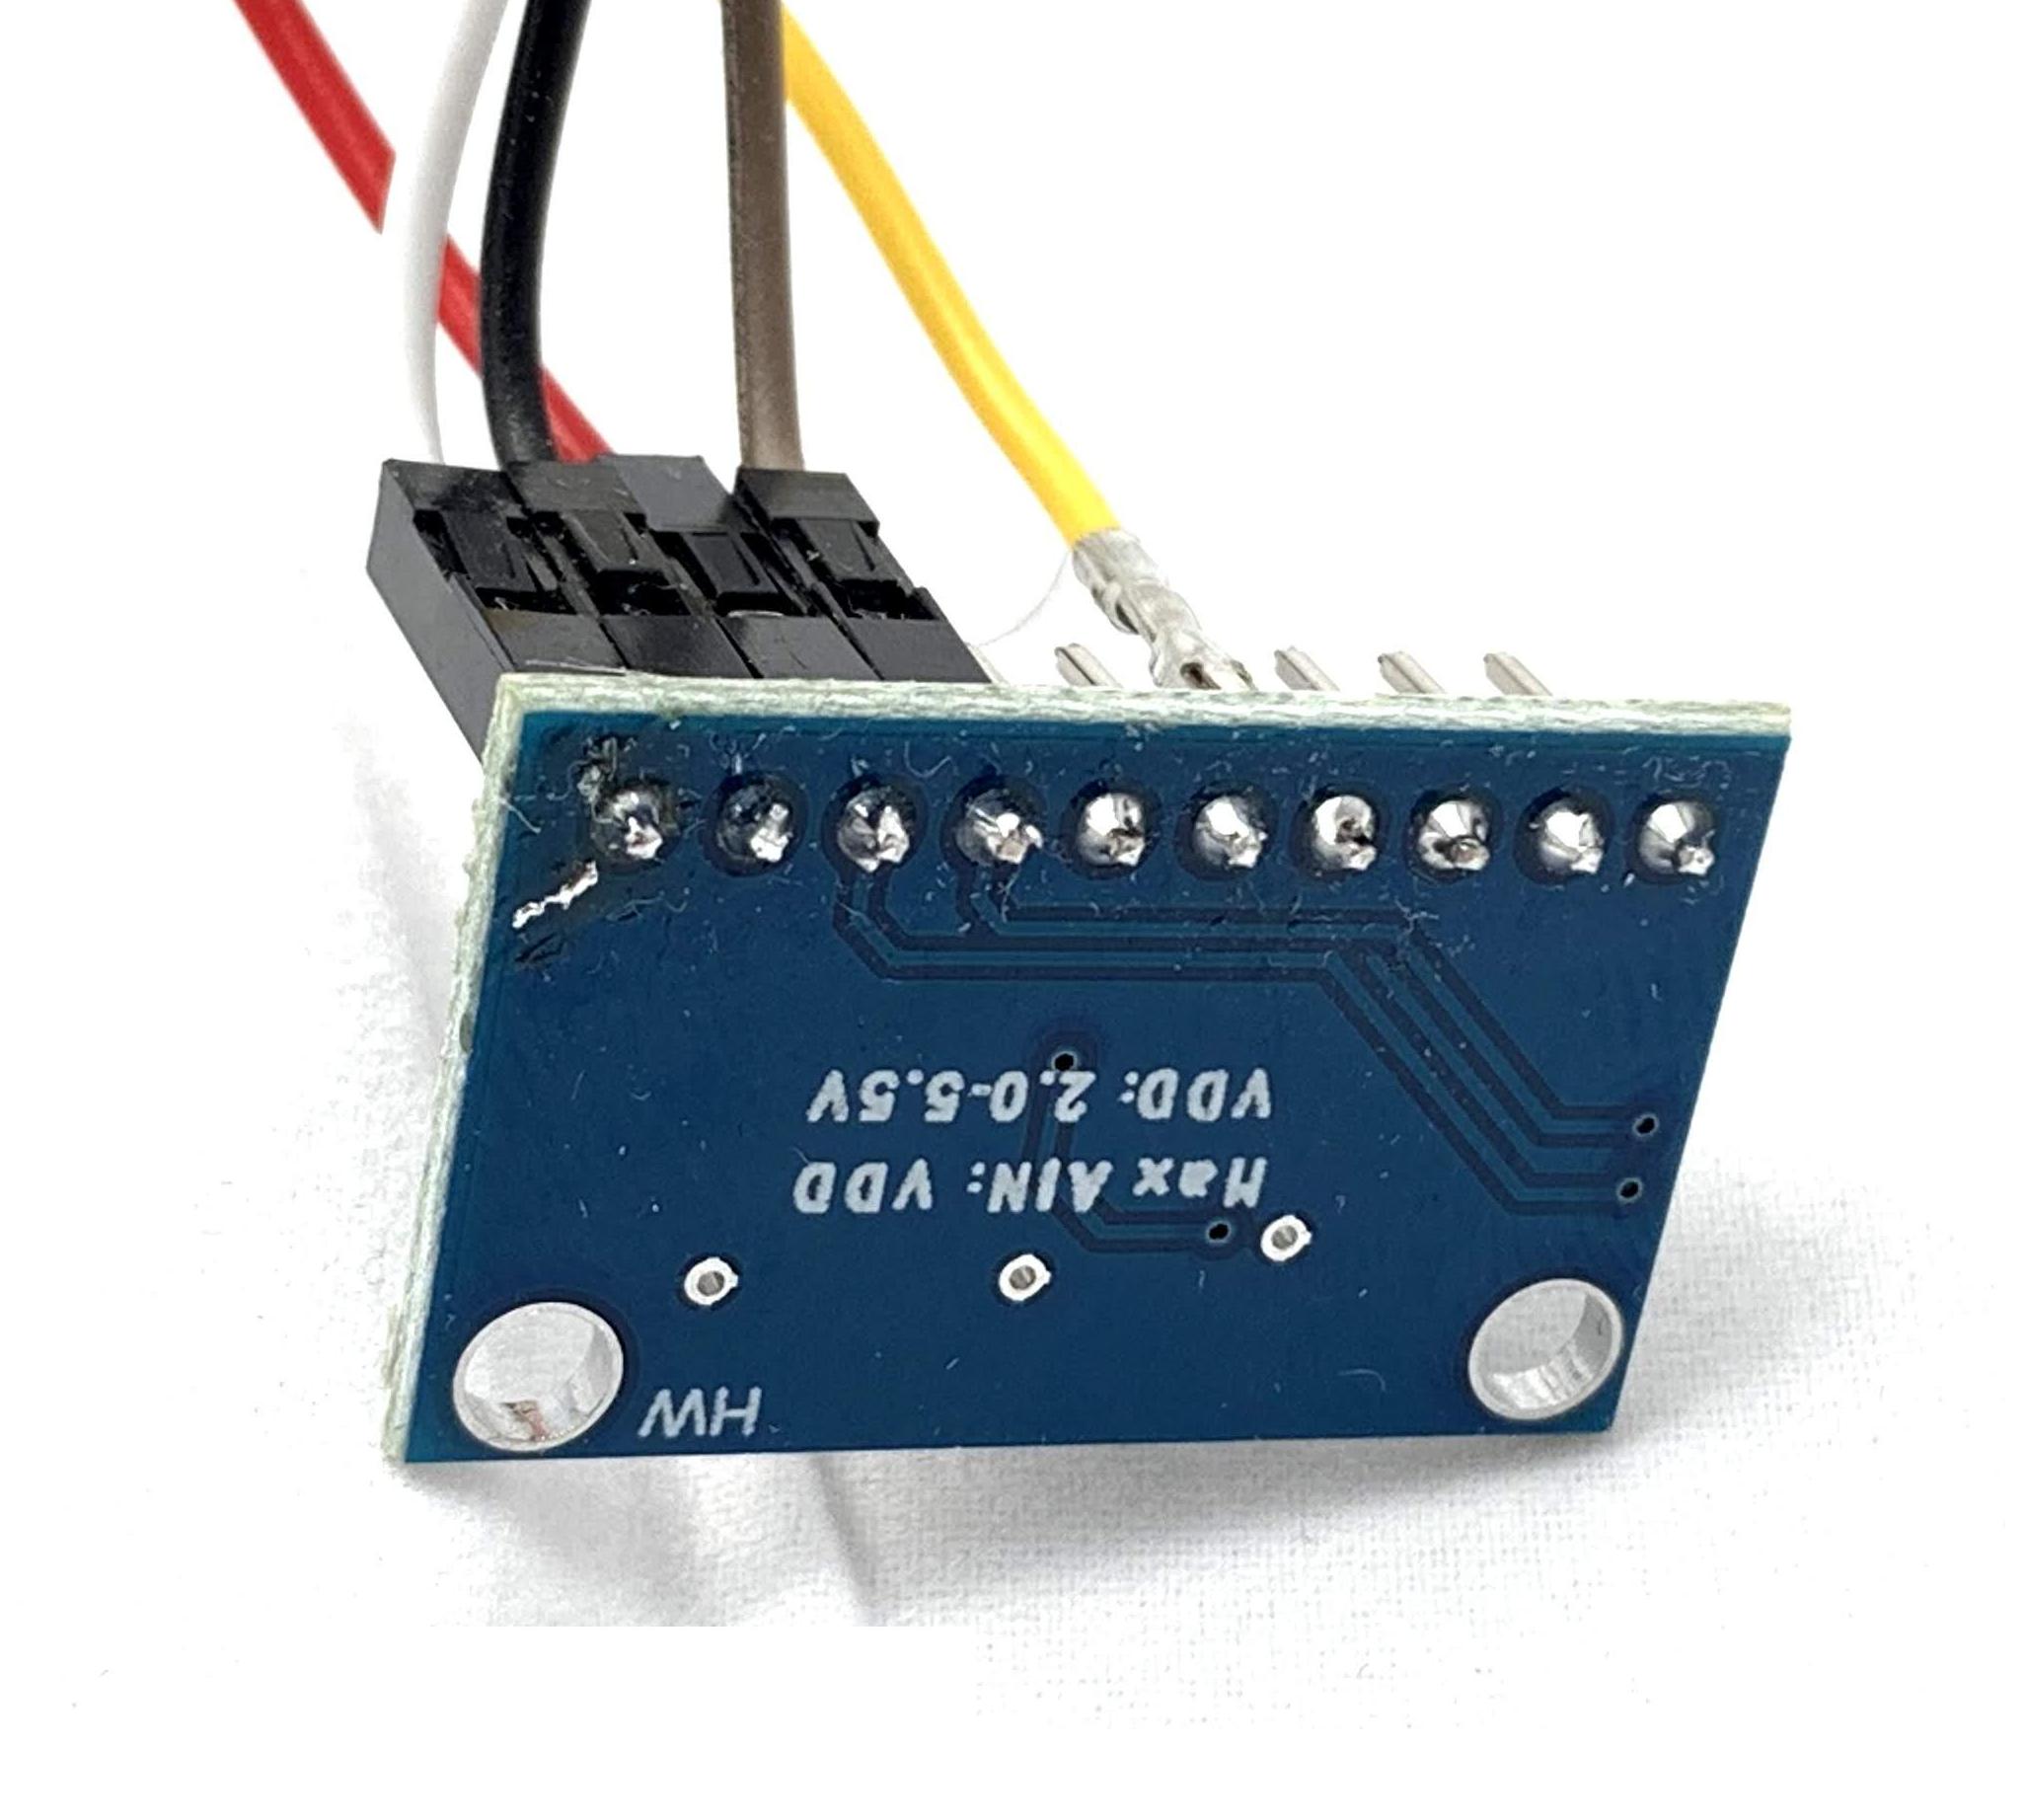
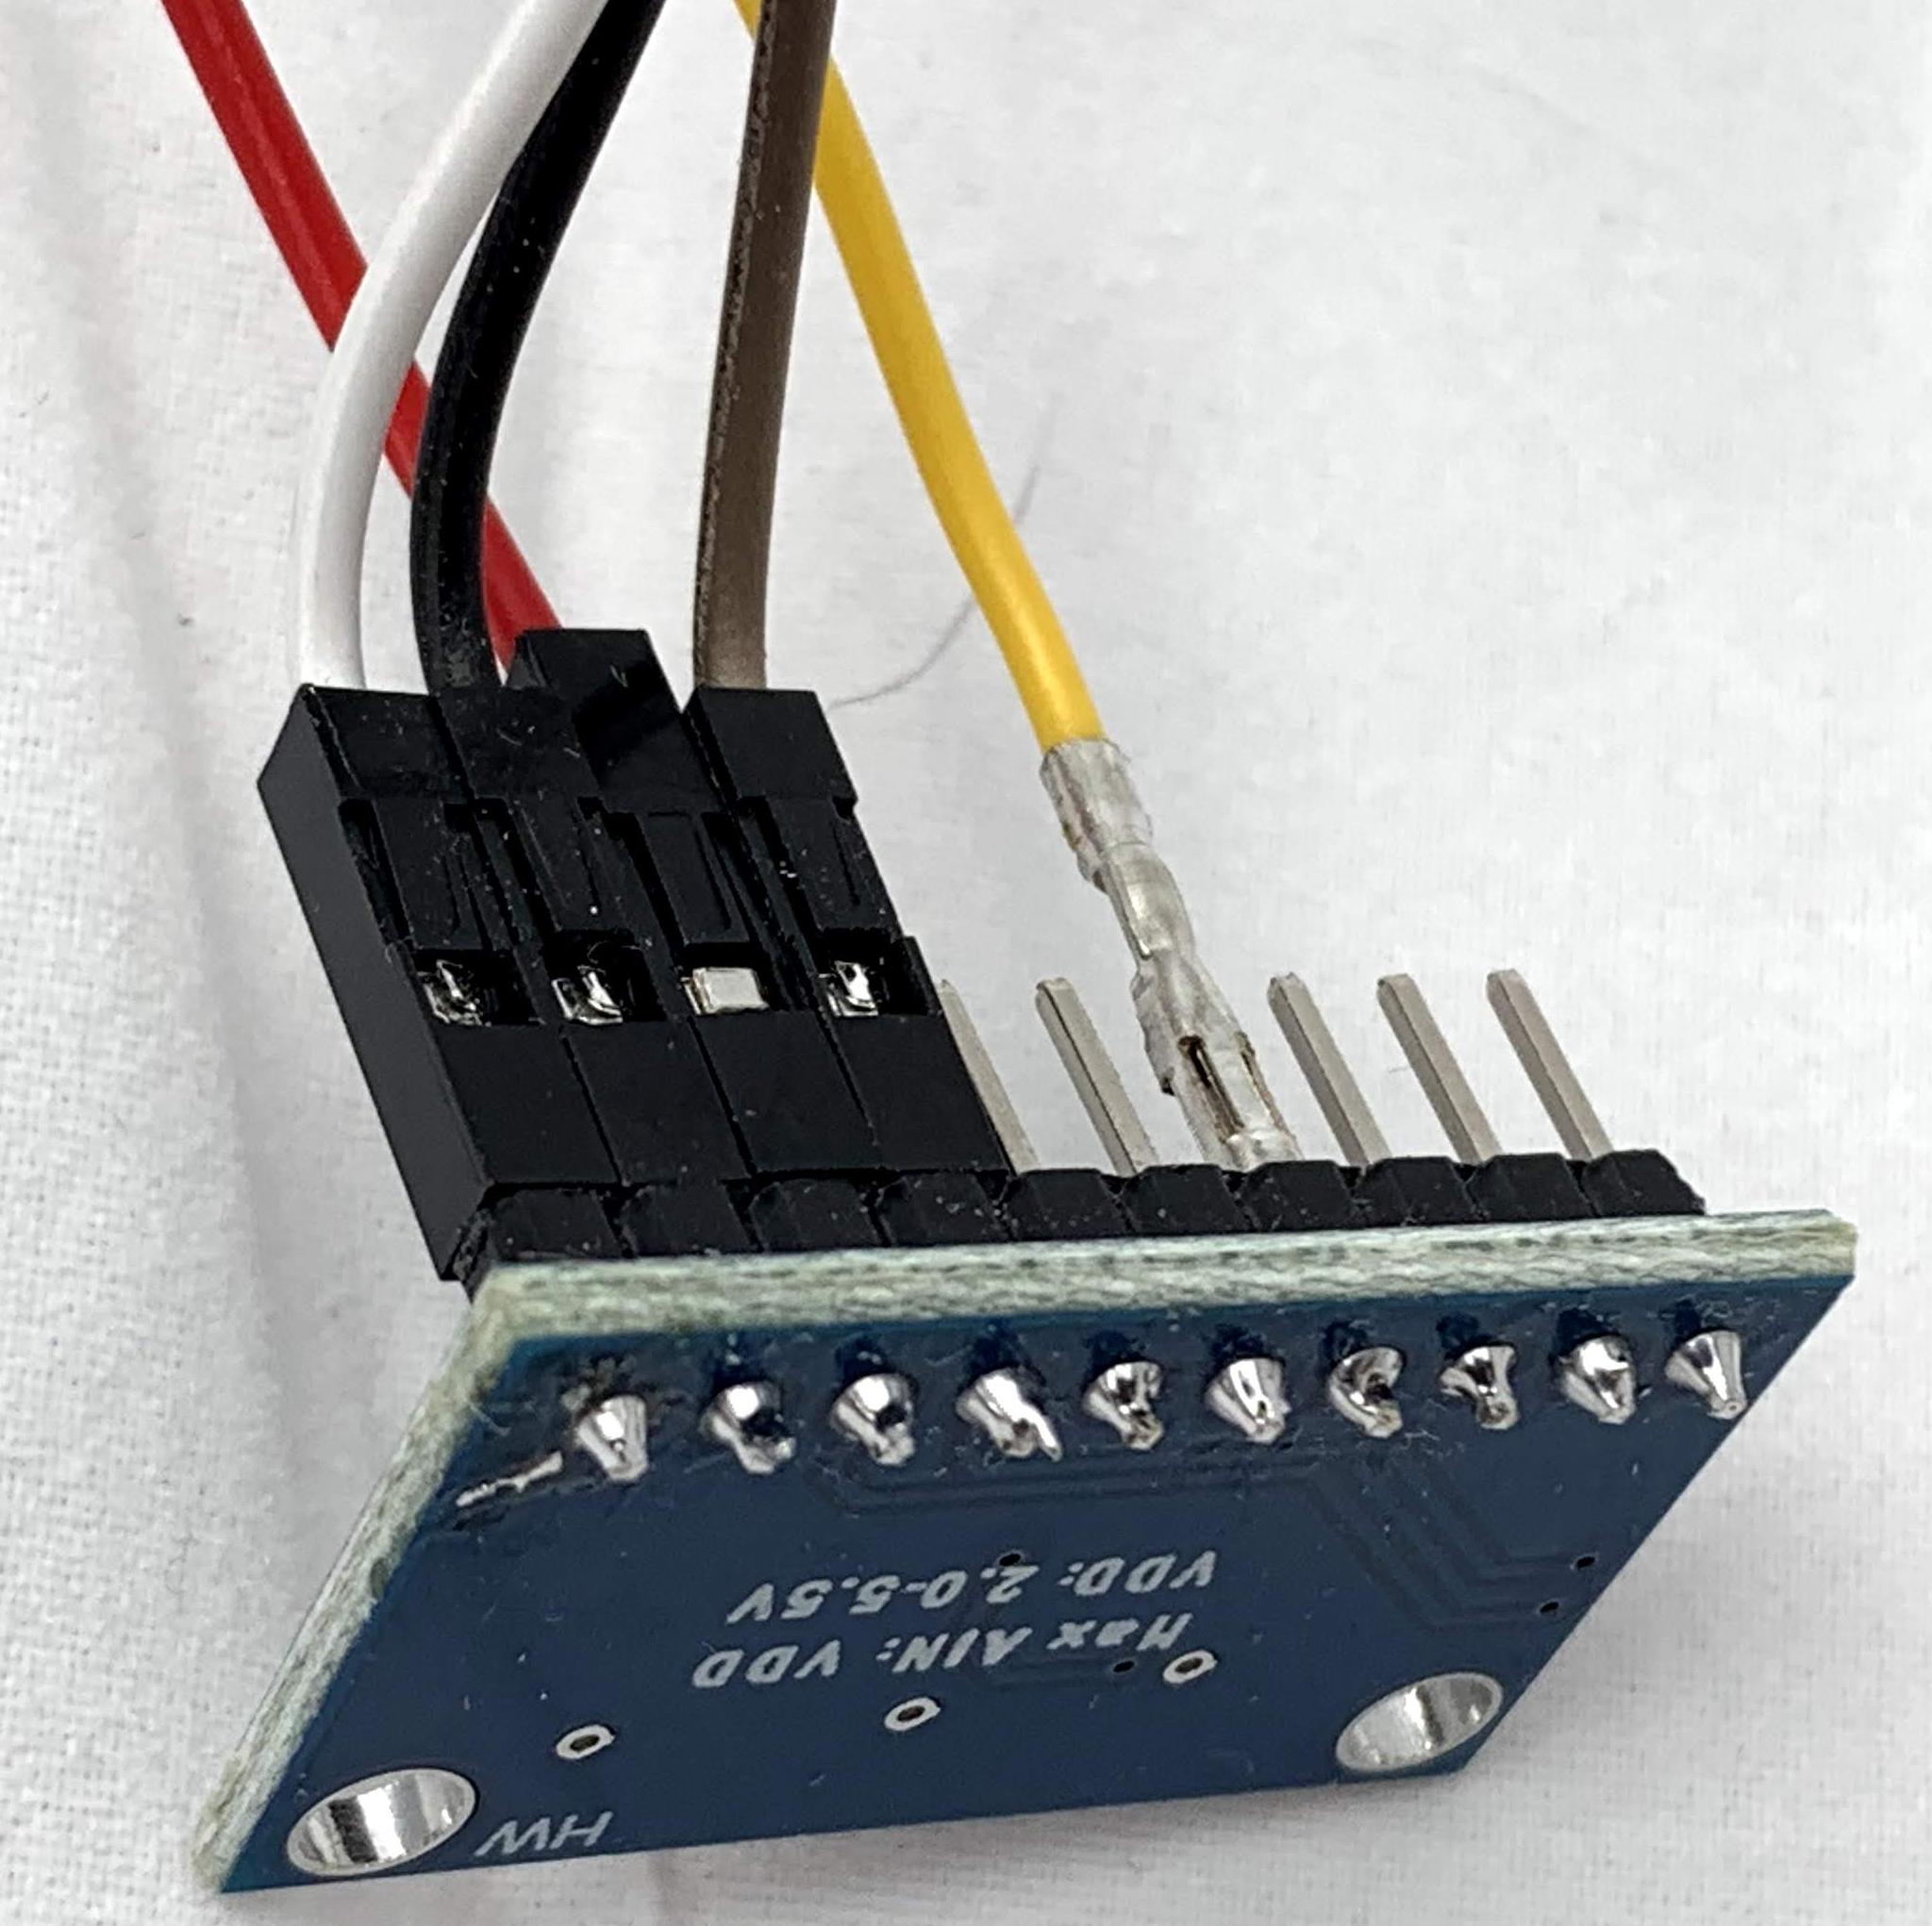
ADC Wiring
Here you can see how the wiring should look on the ADC. The A0, A1, A2, A3 are the data channels from each analog input. SCL is Serial Clock, and SDA is Serial Data - there are corresponding pins on the GPIO on the PI. GND is ground; VDD is 3V+ input.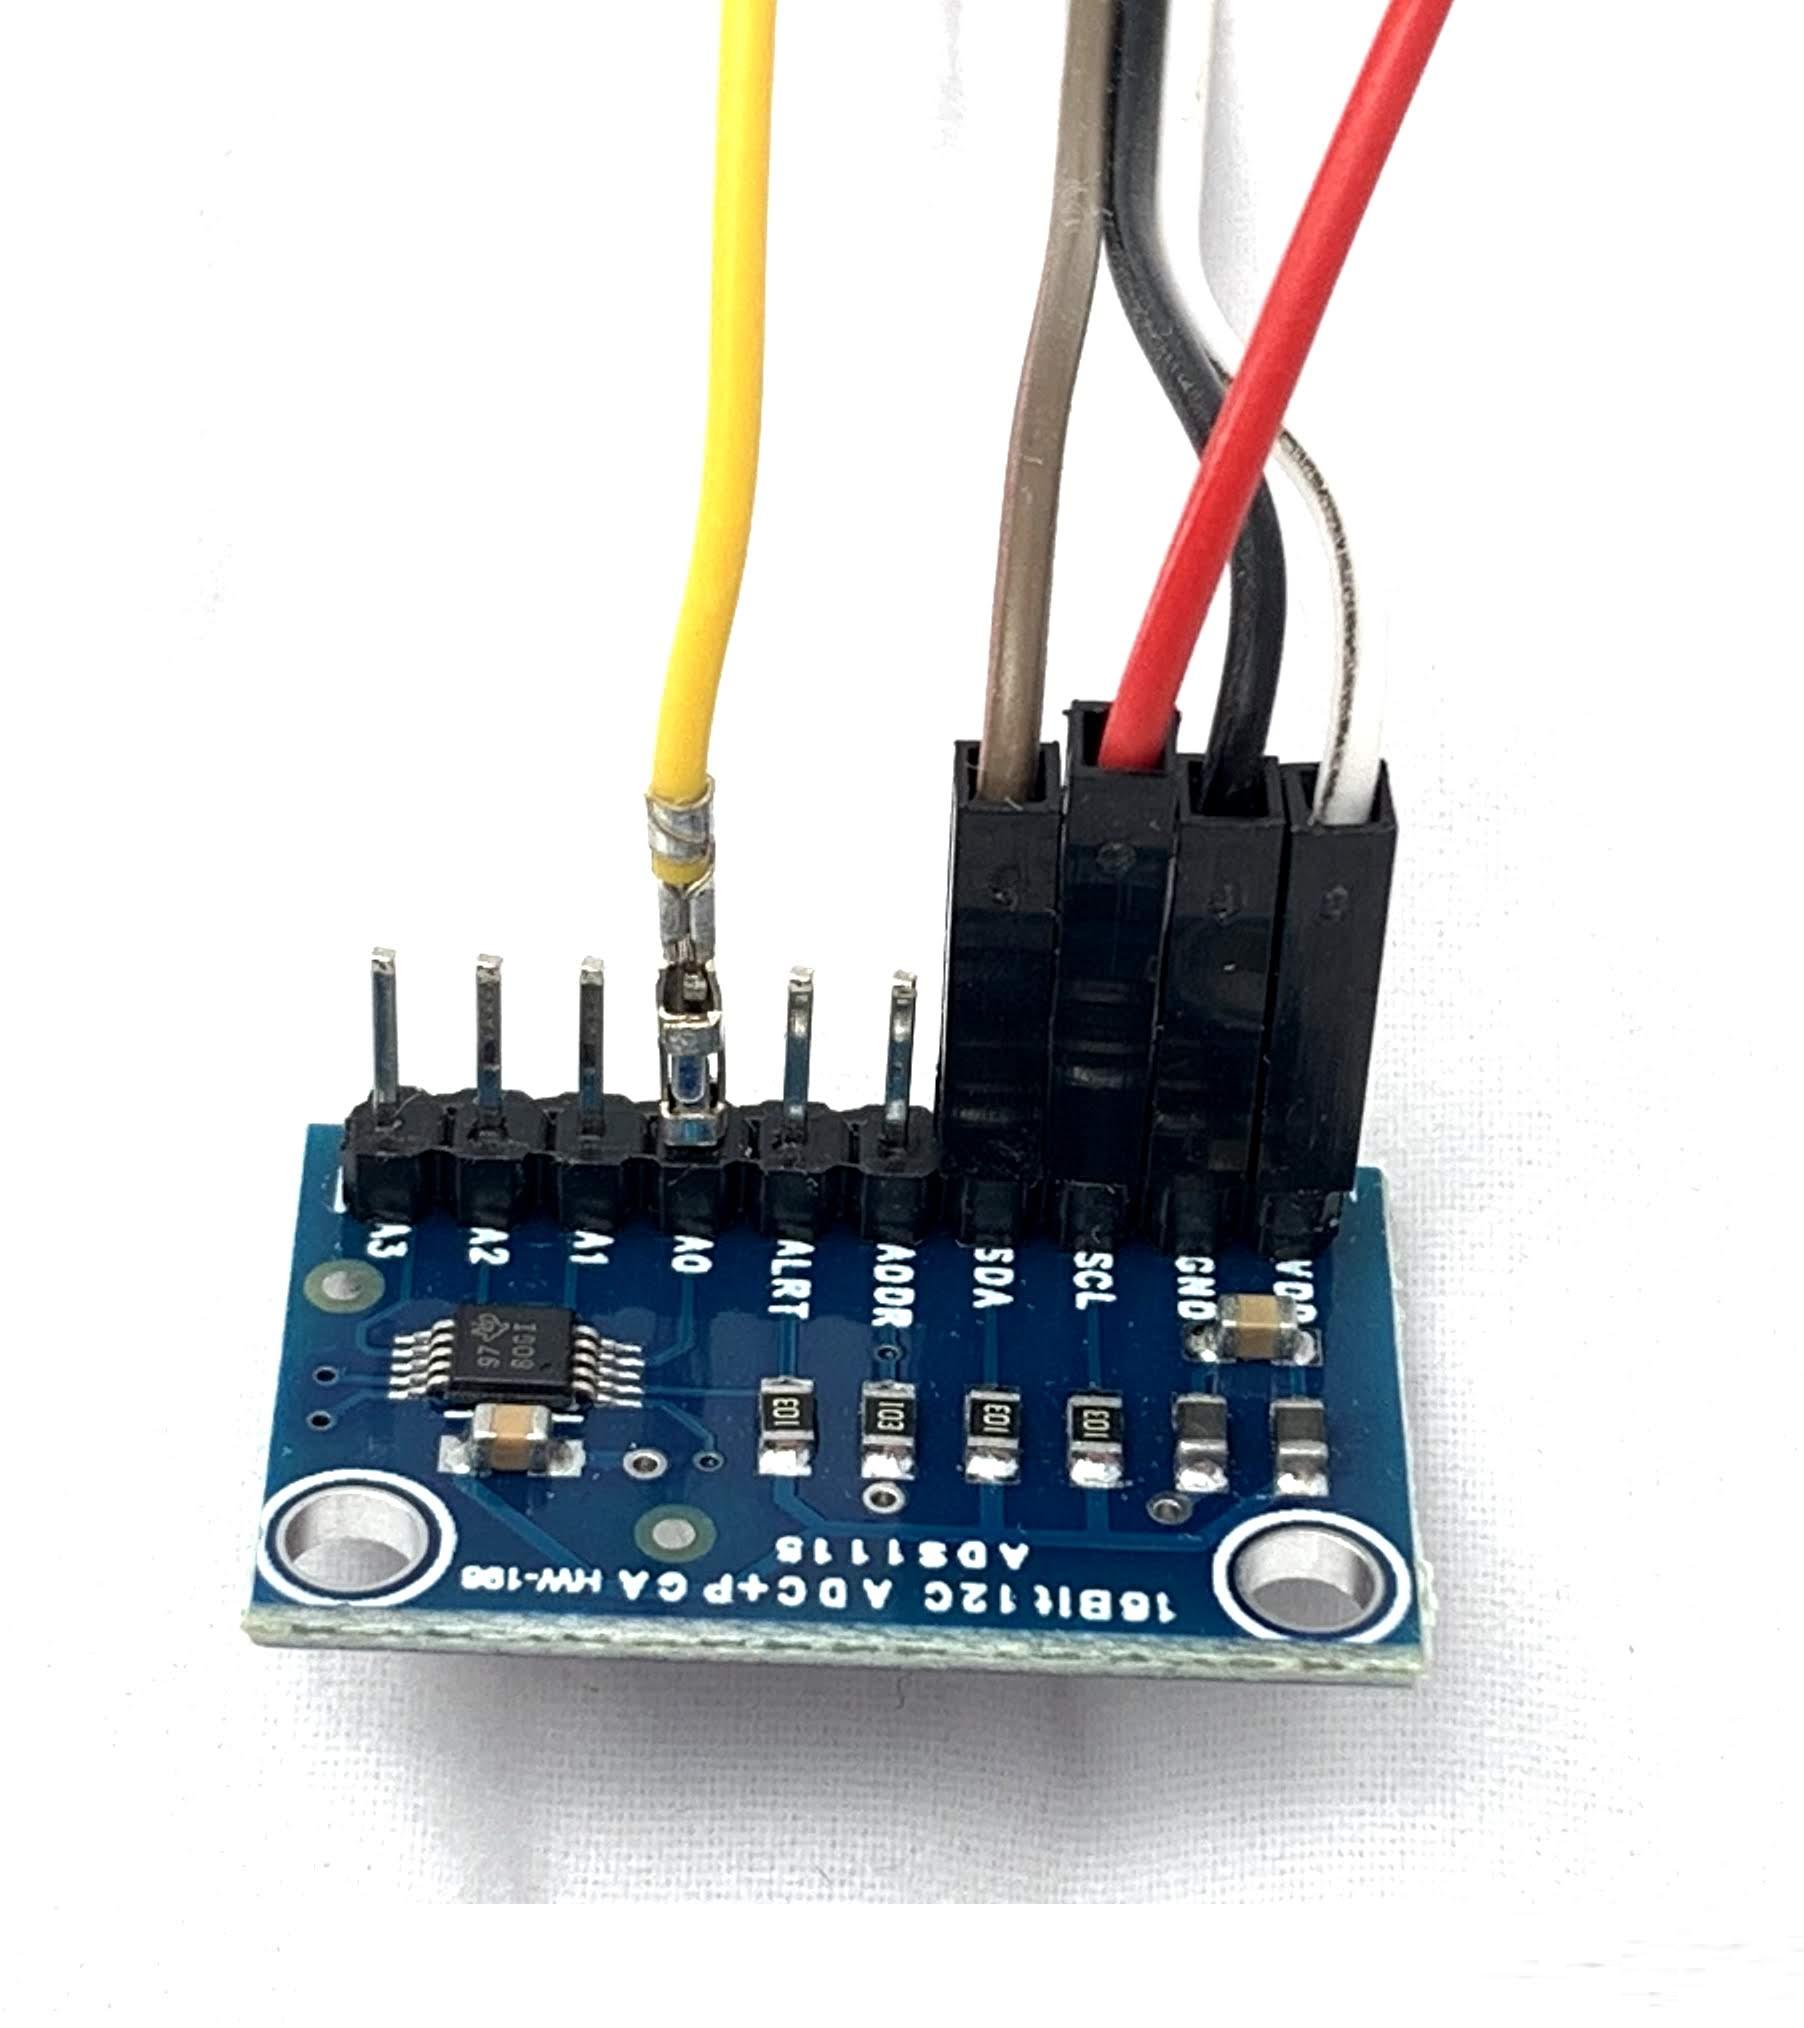
Soil Sensor
I had to remove one of the pins from the connector in order to get this connected properly, and insert one of the Temp/Humidity sensor wires into the connector so I could access the 5V GPIO pin. Note the 3 pin connector with only 2 wires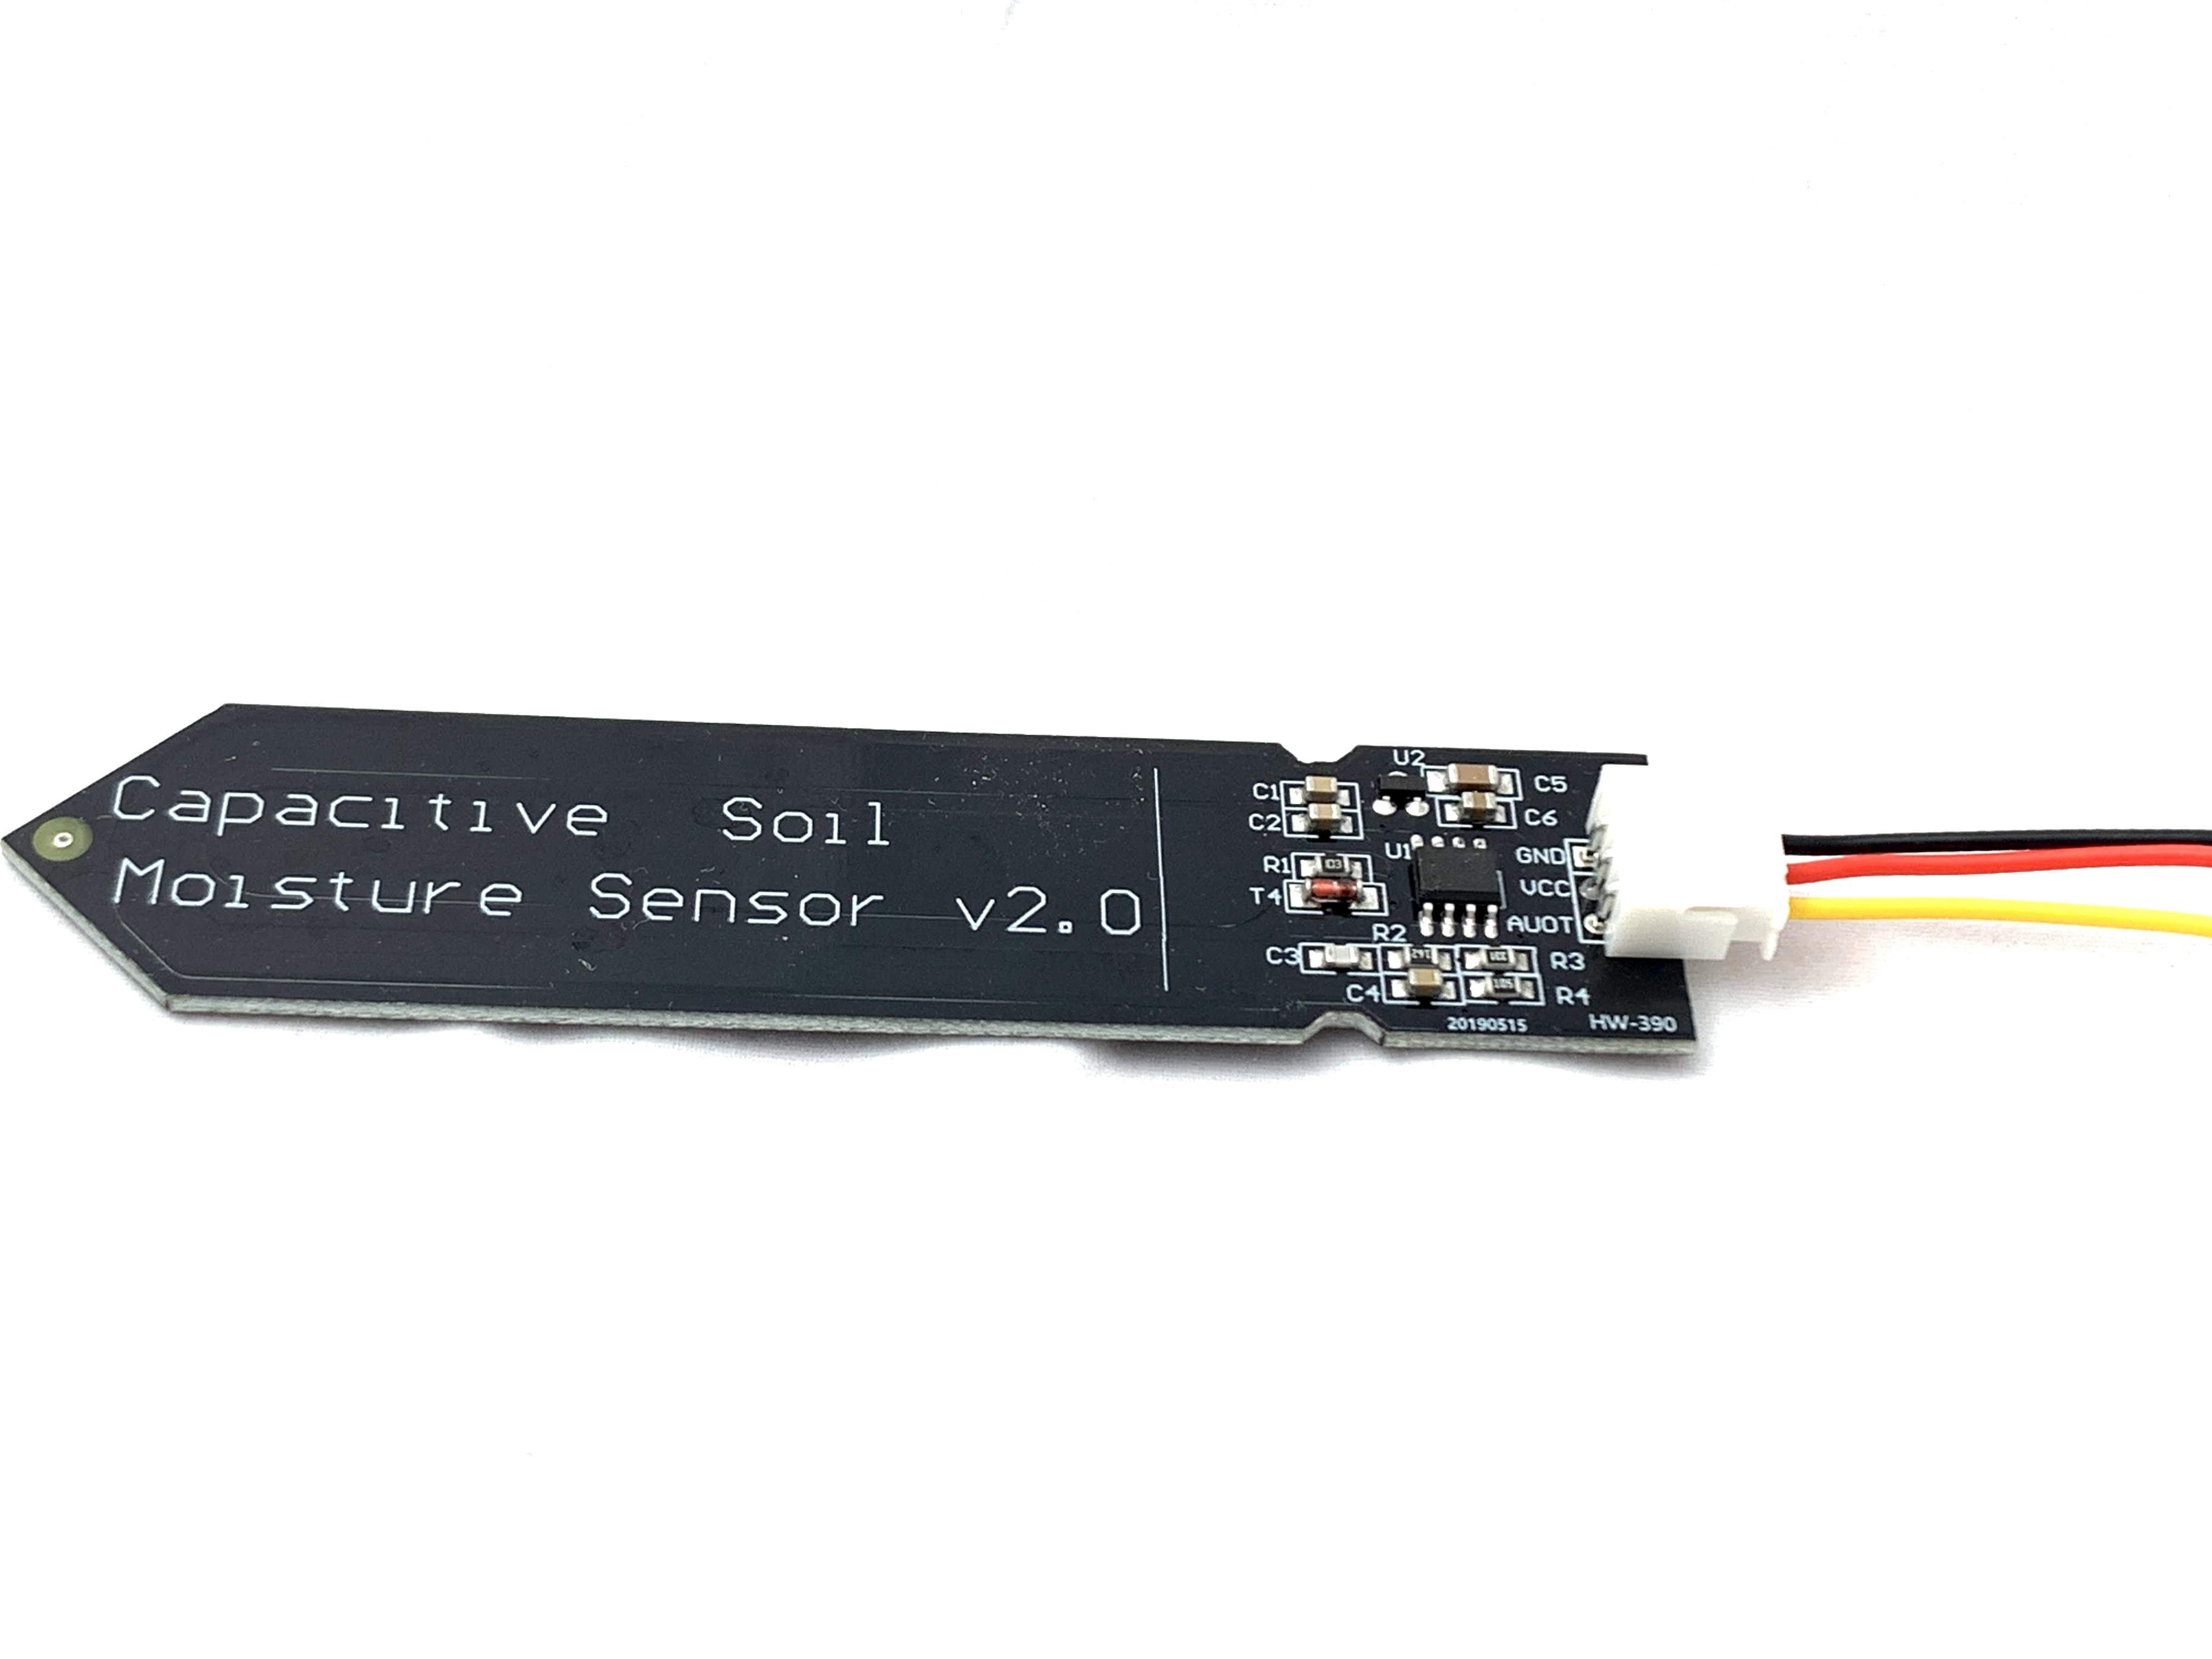
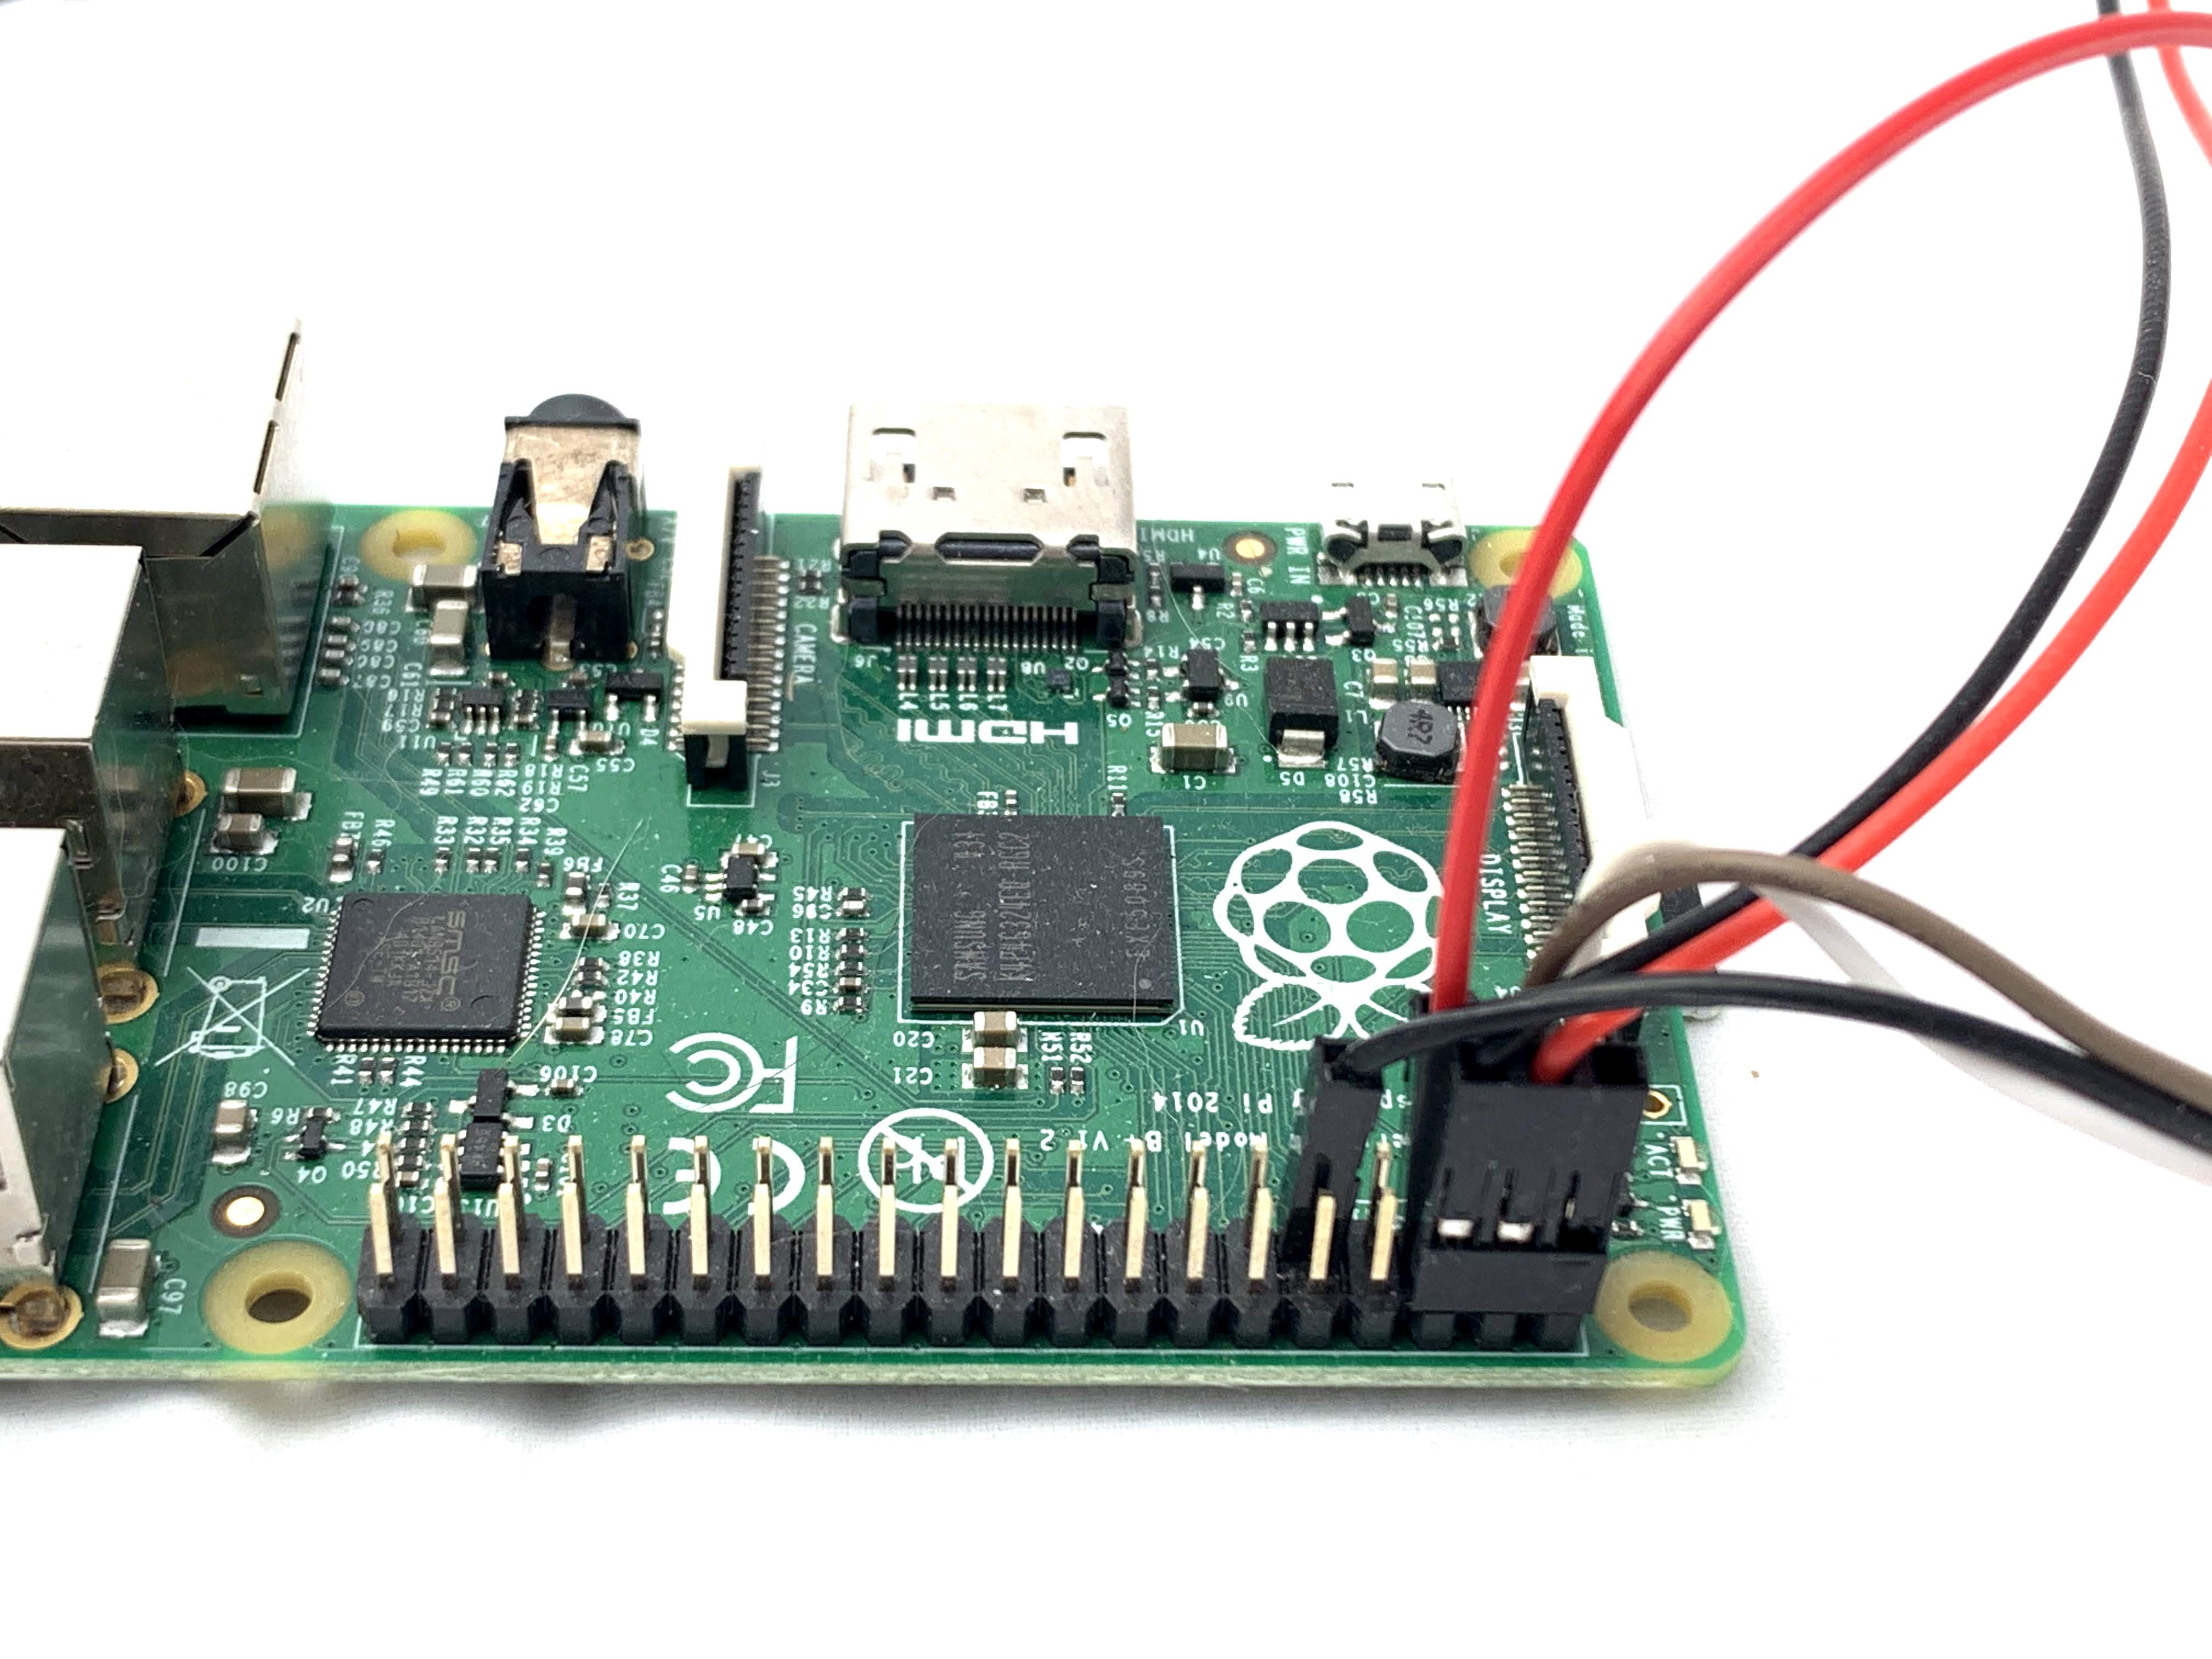
Temp/Humidity Sensor
I used a 3 wire DHT22 sensor. There’s a positive (5V), ground and data pin.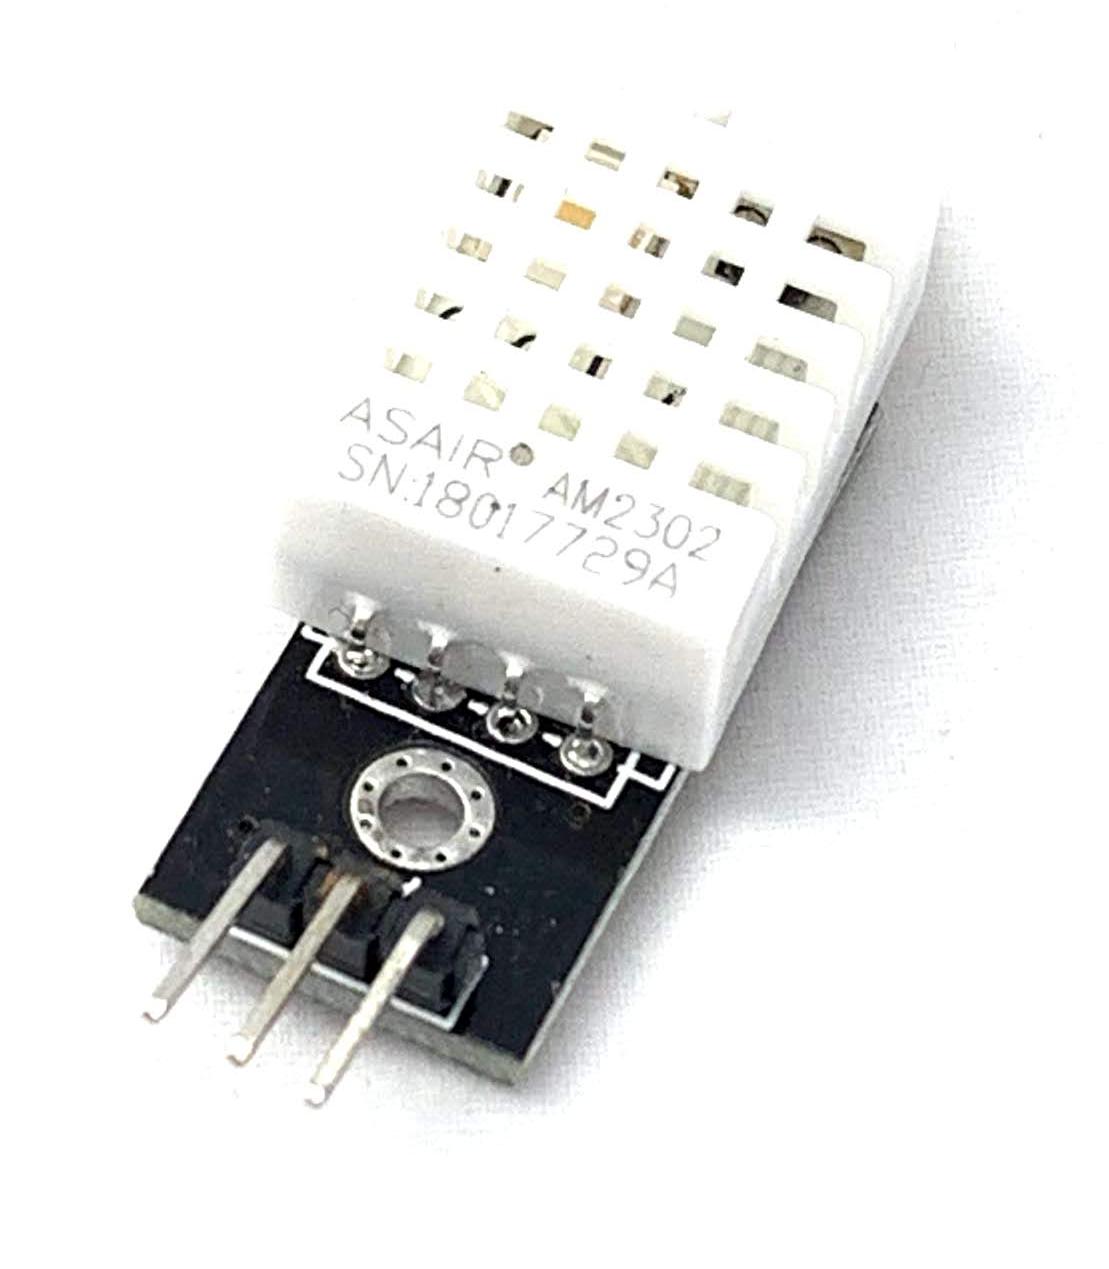
The only remaining 5V in my GPIO was covered up by the 3 pin connector from the Moisture Sensor. Since I removed the wire from the 3rd hole of the connector, I was able to put the 5V wire from the Temp Sensor into the connector from the Moisture Sensor. Hacked! Note there are TWO brown wires - the + from the temp sensor goes to the empty pin hole in the back row (GPIO pin 2)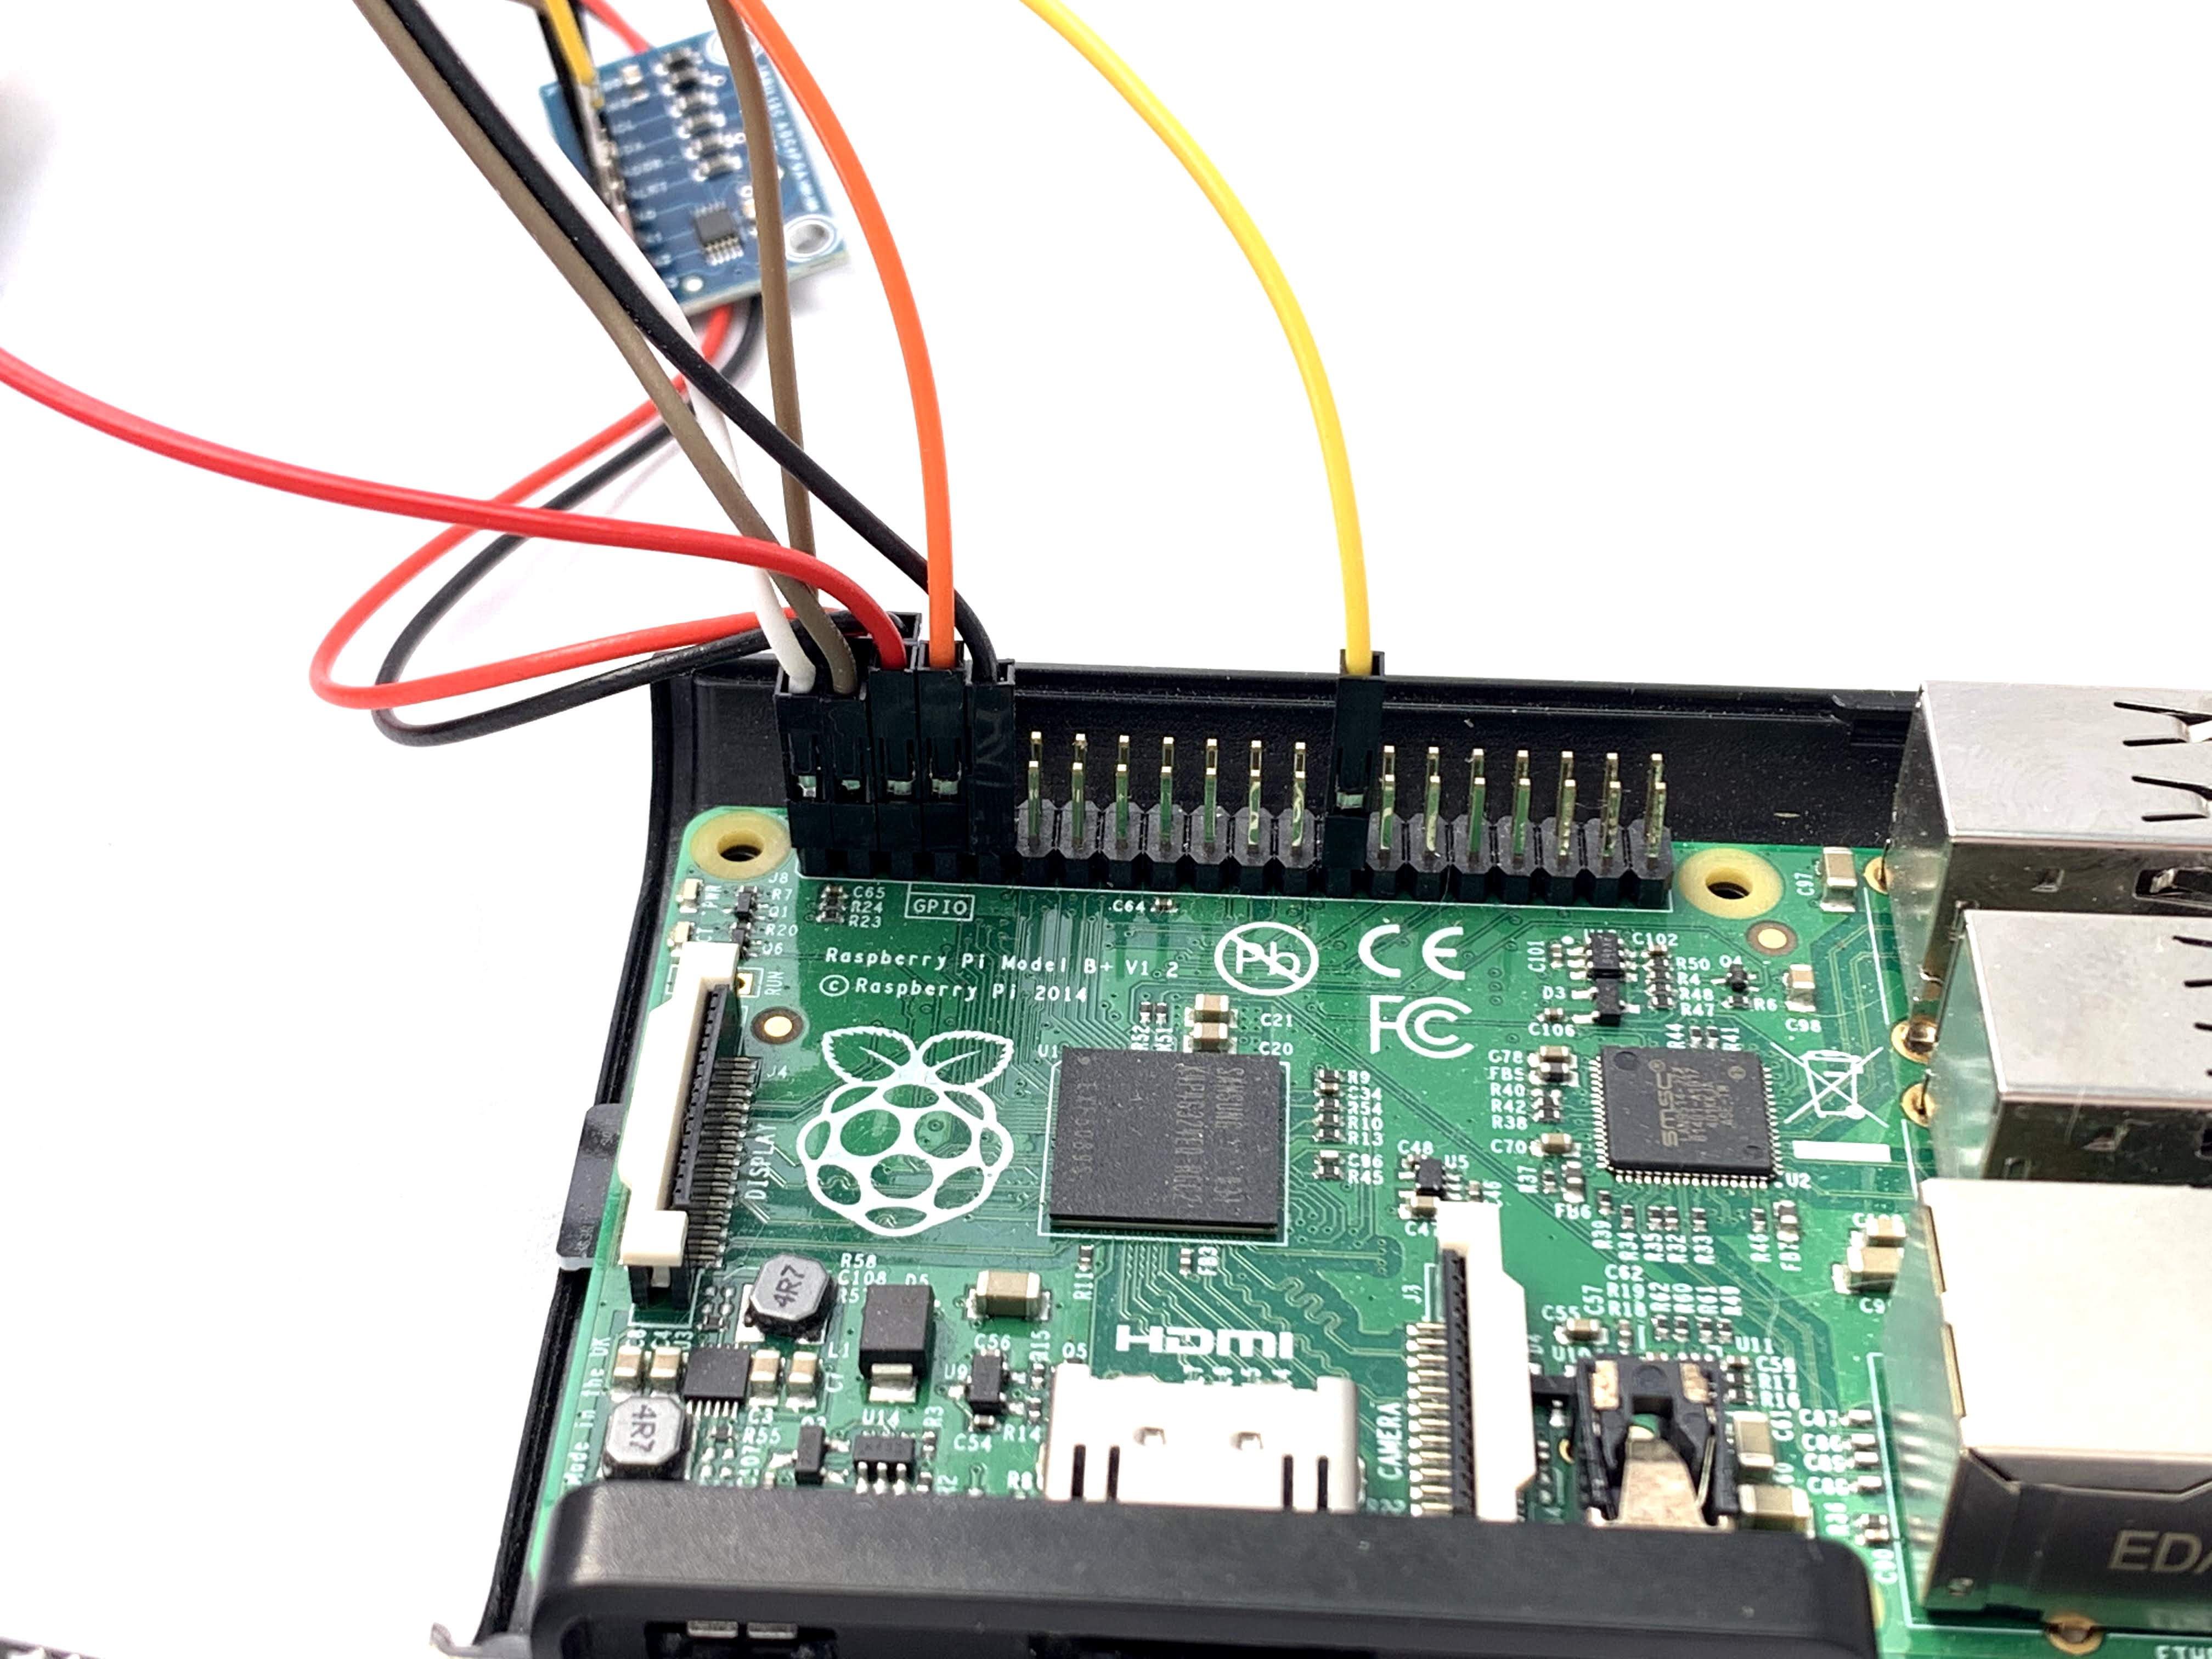
Test it!
Raspberry Pi
You should now have all the wires connected! Run this on the Pi with Python to check that you have good connectivity to the sensors and that you are getting data.
Pre-reqs
Make sure I2C is installed: https://learn.adafruit.com/adafruits-raspberry-pi-lesson-4-gpio-setup/configuring-i2c
Some more info about connecting to the ADC from Python: https://learn.adafruit.com/adafruit-4-channel-adc-breakouts/python-circuitpython
Test basic sensor connectivity (test.py is in the plant-waterify repo):
git clone git@gitlab.jasondale.me:jdale/plant-waterify.git
cd plant-waterify
sudo apt install python3-dev python3-pip
pip3 install --upgrade --user requests setuptools wheel Adafruit-DHT adafruit-circuitpython-ads1x15
Set up your config file:
~/.config/plant-waterify/config
import time
import board
import busio
import adafruit_ads1x15.ads1015 as ADS
from adafruit_ads1x15.analog_in import AnalogIn
import Adafruit_DHT as dht

# Create the I2C bus
i2c = busio.I2C(board.SCL, board.SDA)

# Create the ADC object using the I2C bus
ads = ADS.ADS1015(i2c)

# Create single-ended input on channel 0 - this is the moisture sensor on channel 0 of the ADC
chan = AnalogIn(ads, ADS.P0)


while True:
    print("Moisture values\n{:>5}\t{:>5}".format("raw", "v"))
    print("{:>5}\t{:>5.3f}".format(chan.value, chan.voltage))
    # dht is the digital humidity and temperature sensor
    h, t = dht.read_retry(dht.DHT22, 4)
    f = format((9.0 / 5.0 * t + 32), ".1f")
    h = format(h, ".1f")
    print("Temp: " + str(f) + "F; " + str(t) + "C; " + str(h) + "%")

    time.sleep(0.5)
The moisture sensor will not give you a percentage - you will need our good old friend MATH for that. Run the test with the sensor tip in a cup of water. When it levels out, make note of the values. Dry off the sensor (or check it before you put it in the water) and make note of the values. I am not sure if ambient humidity will greatly impact the dry values, but you can use the humidity sensor to know how much ambient humidity there is and go from there.
Web Server
API
You will need to clone the repo, run Go build, then run the binary (requires Go installed):
git clone git@gitlab.jasondale.me:jdale/plant-waterify-api.git
go build
./plant-waterify-api
You can then use curl or Postman to send test API calls. POST’s will require JSON in a valid format as the Python app would send:
[
  {
    "date": "06/05/2020 07:13:49",
    "sector": 1,
    "temperature": 90,
    "humidity": 40,
    "moisture": 43,
    "pump_fired": true
  }
]
Front End
Clone the repo, then run the nuxt commands to start the server:
git@gitlab.jasondale.me:jdale/plant-waterify-web.git
nuxt build
nuxt start
You will either need to point to the URL:port, or use something like Caddy to proxy
http://plant-waterify.jasondale.me {
    proxy / http://127.0.0.1:8000 {
        fail_timeout 0s
        header_upstream X-Forwarded-Ssl on
        transparent
    }
}
Lessons Learned
- Always assume your project will go on the internet and use different colored wires. Multiple wires of the same color will make this annoying for others to follow, and for me to troubleshoot if needed later.
- Get a good soldering iron. They are not crazy expensive and will be used for years.
TODO:
gitlab-ci.ymldeployment- Receive Relay/pumps, test hardware/code with the actual sensors connected
- Update photos with all sensors
- Install everything in the garden and run it